APNs Credentials settings are identical to iOS native sttings. Set by referring to Set up APNs credential of iOS.
Make sure you have installed Facebook’s PushNotificationiOS. If it is not installed, refer to the react-native-push-notification repository to install it and proceed with the following procedure.
Requests permission to use push notification.
Acquire the device token. And notify the Channel Talk that the PushToken has changed.
Notifies Channel Talk that the user has received a push notification.
To handle push notifications, Add the following guides to your iOS project.
The below guide below follows the React-native-official-guide.
AppDelegate.swift
1. AppDelegate.h
Adopts UNUserNotificationCenter. For example:
2. AppDelegate.m
Modify the AppDelegate implementation by referring to the following.
The example below handles Channel Talk push notifications when the app is in the background or terminated. Add it to AppDelegate.m.
If you want to open the message when entering the app through push notification, add the example below to the componentDidMount() method of App.js.
This extension helps you respond appropriately to the Channel Talk remote push notification, even when the app is background or terminated.
Channel Talk recommends that you add this Extension. If you do not add this, both follow-up texting and remote notification may arrive. Setting it up in your project through iOS Notification Extension document.
This section describes how to support system push notification on Android.
To use system push notification in Android API level 33(Tiramisu) or above, you need POST_NOTIFICATIONS permission.
Channel Talk Android SDK does not request permission. Your application should request it manually. See Android official documentation regarding notification.
Configure Android project with Firebase setup guide.
Download the
google-service.jsonfile and place it in the root directory of the app scope module.
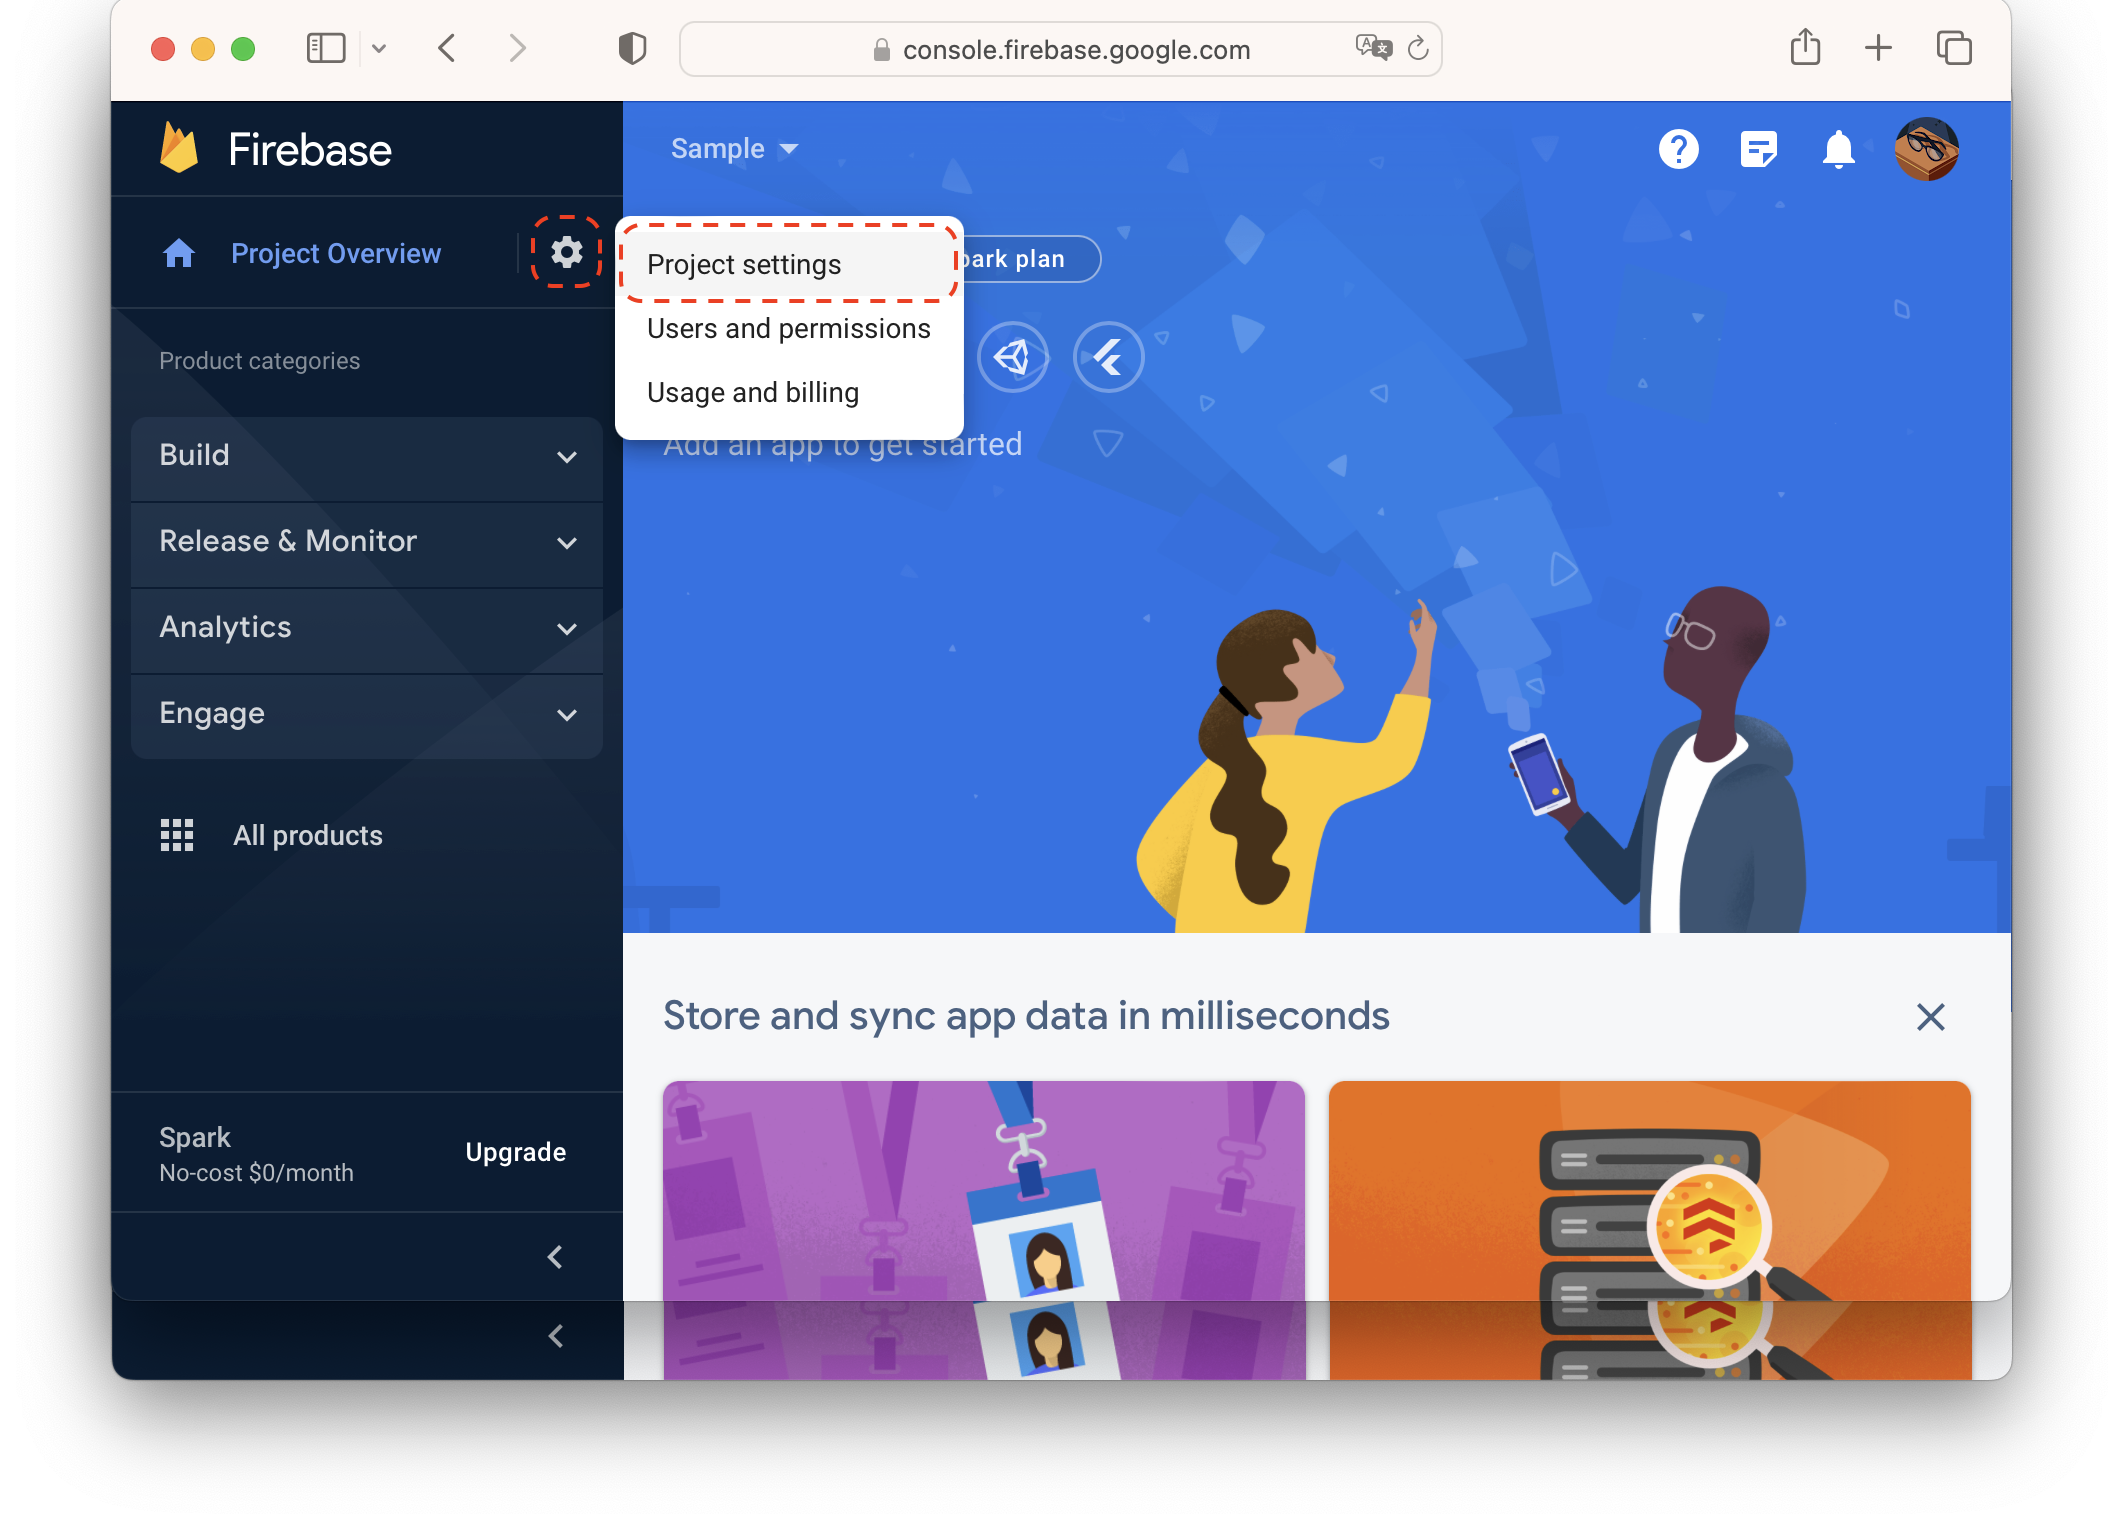
Navigate to Project Overview > Project settings.
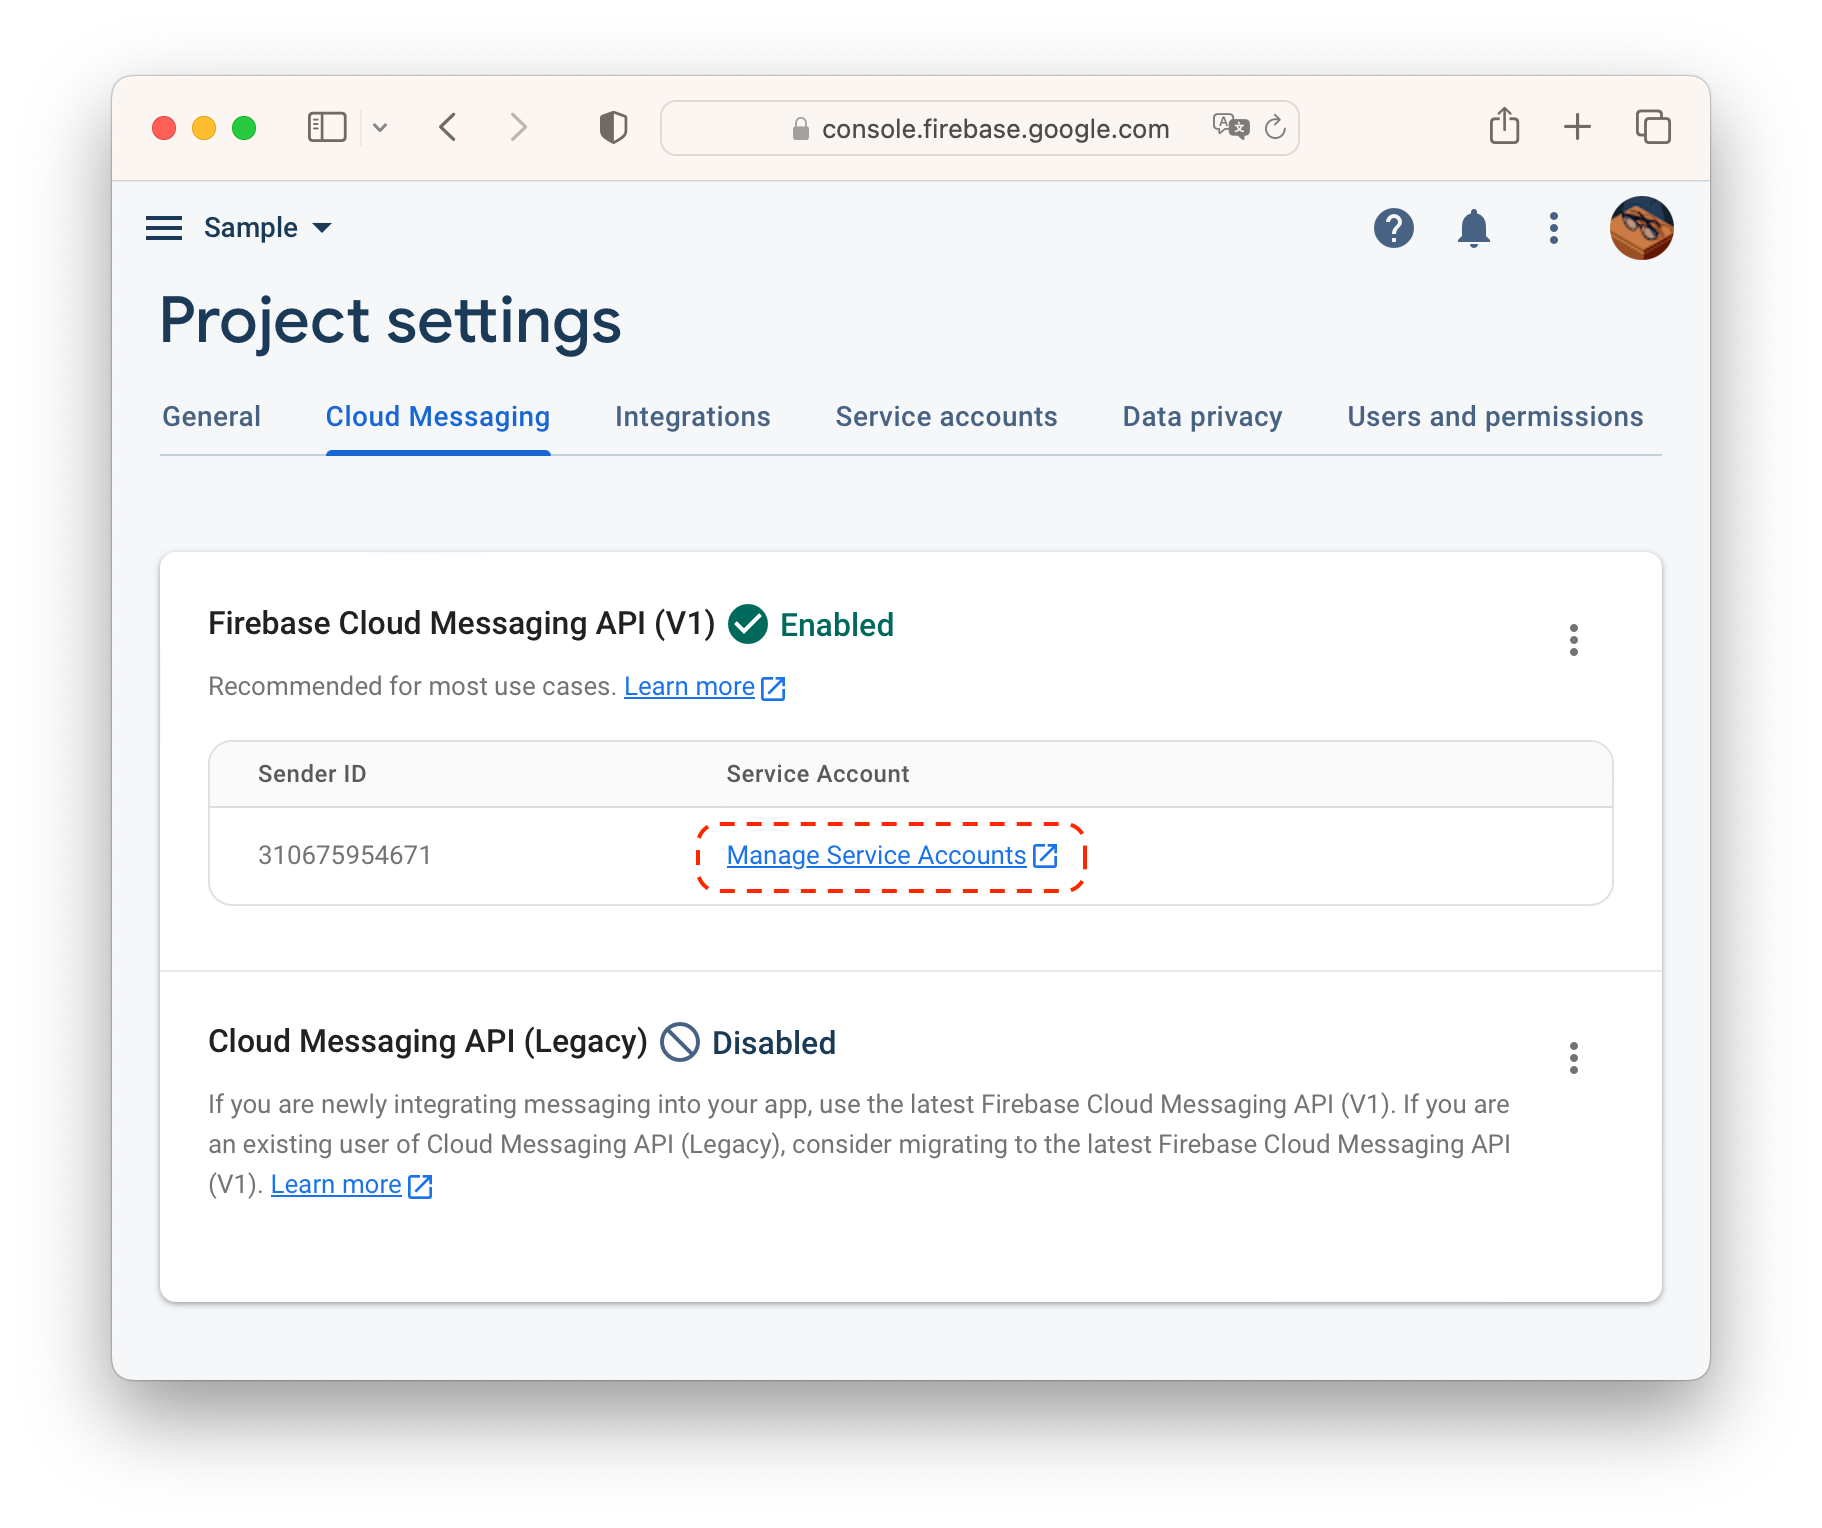
Navigate to Cloud Messaging tab and click Manage Service Accounts.
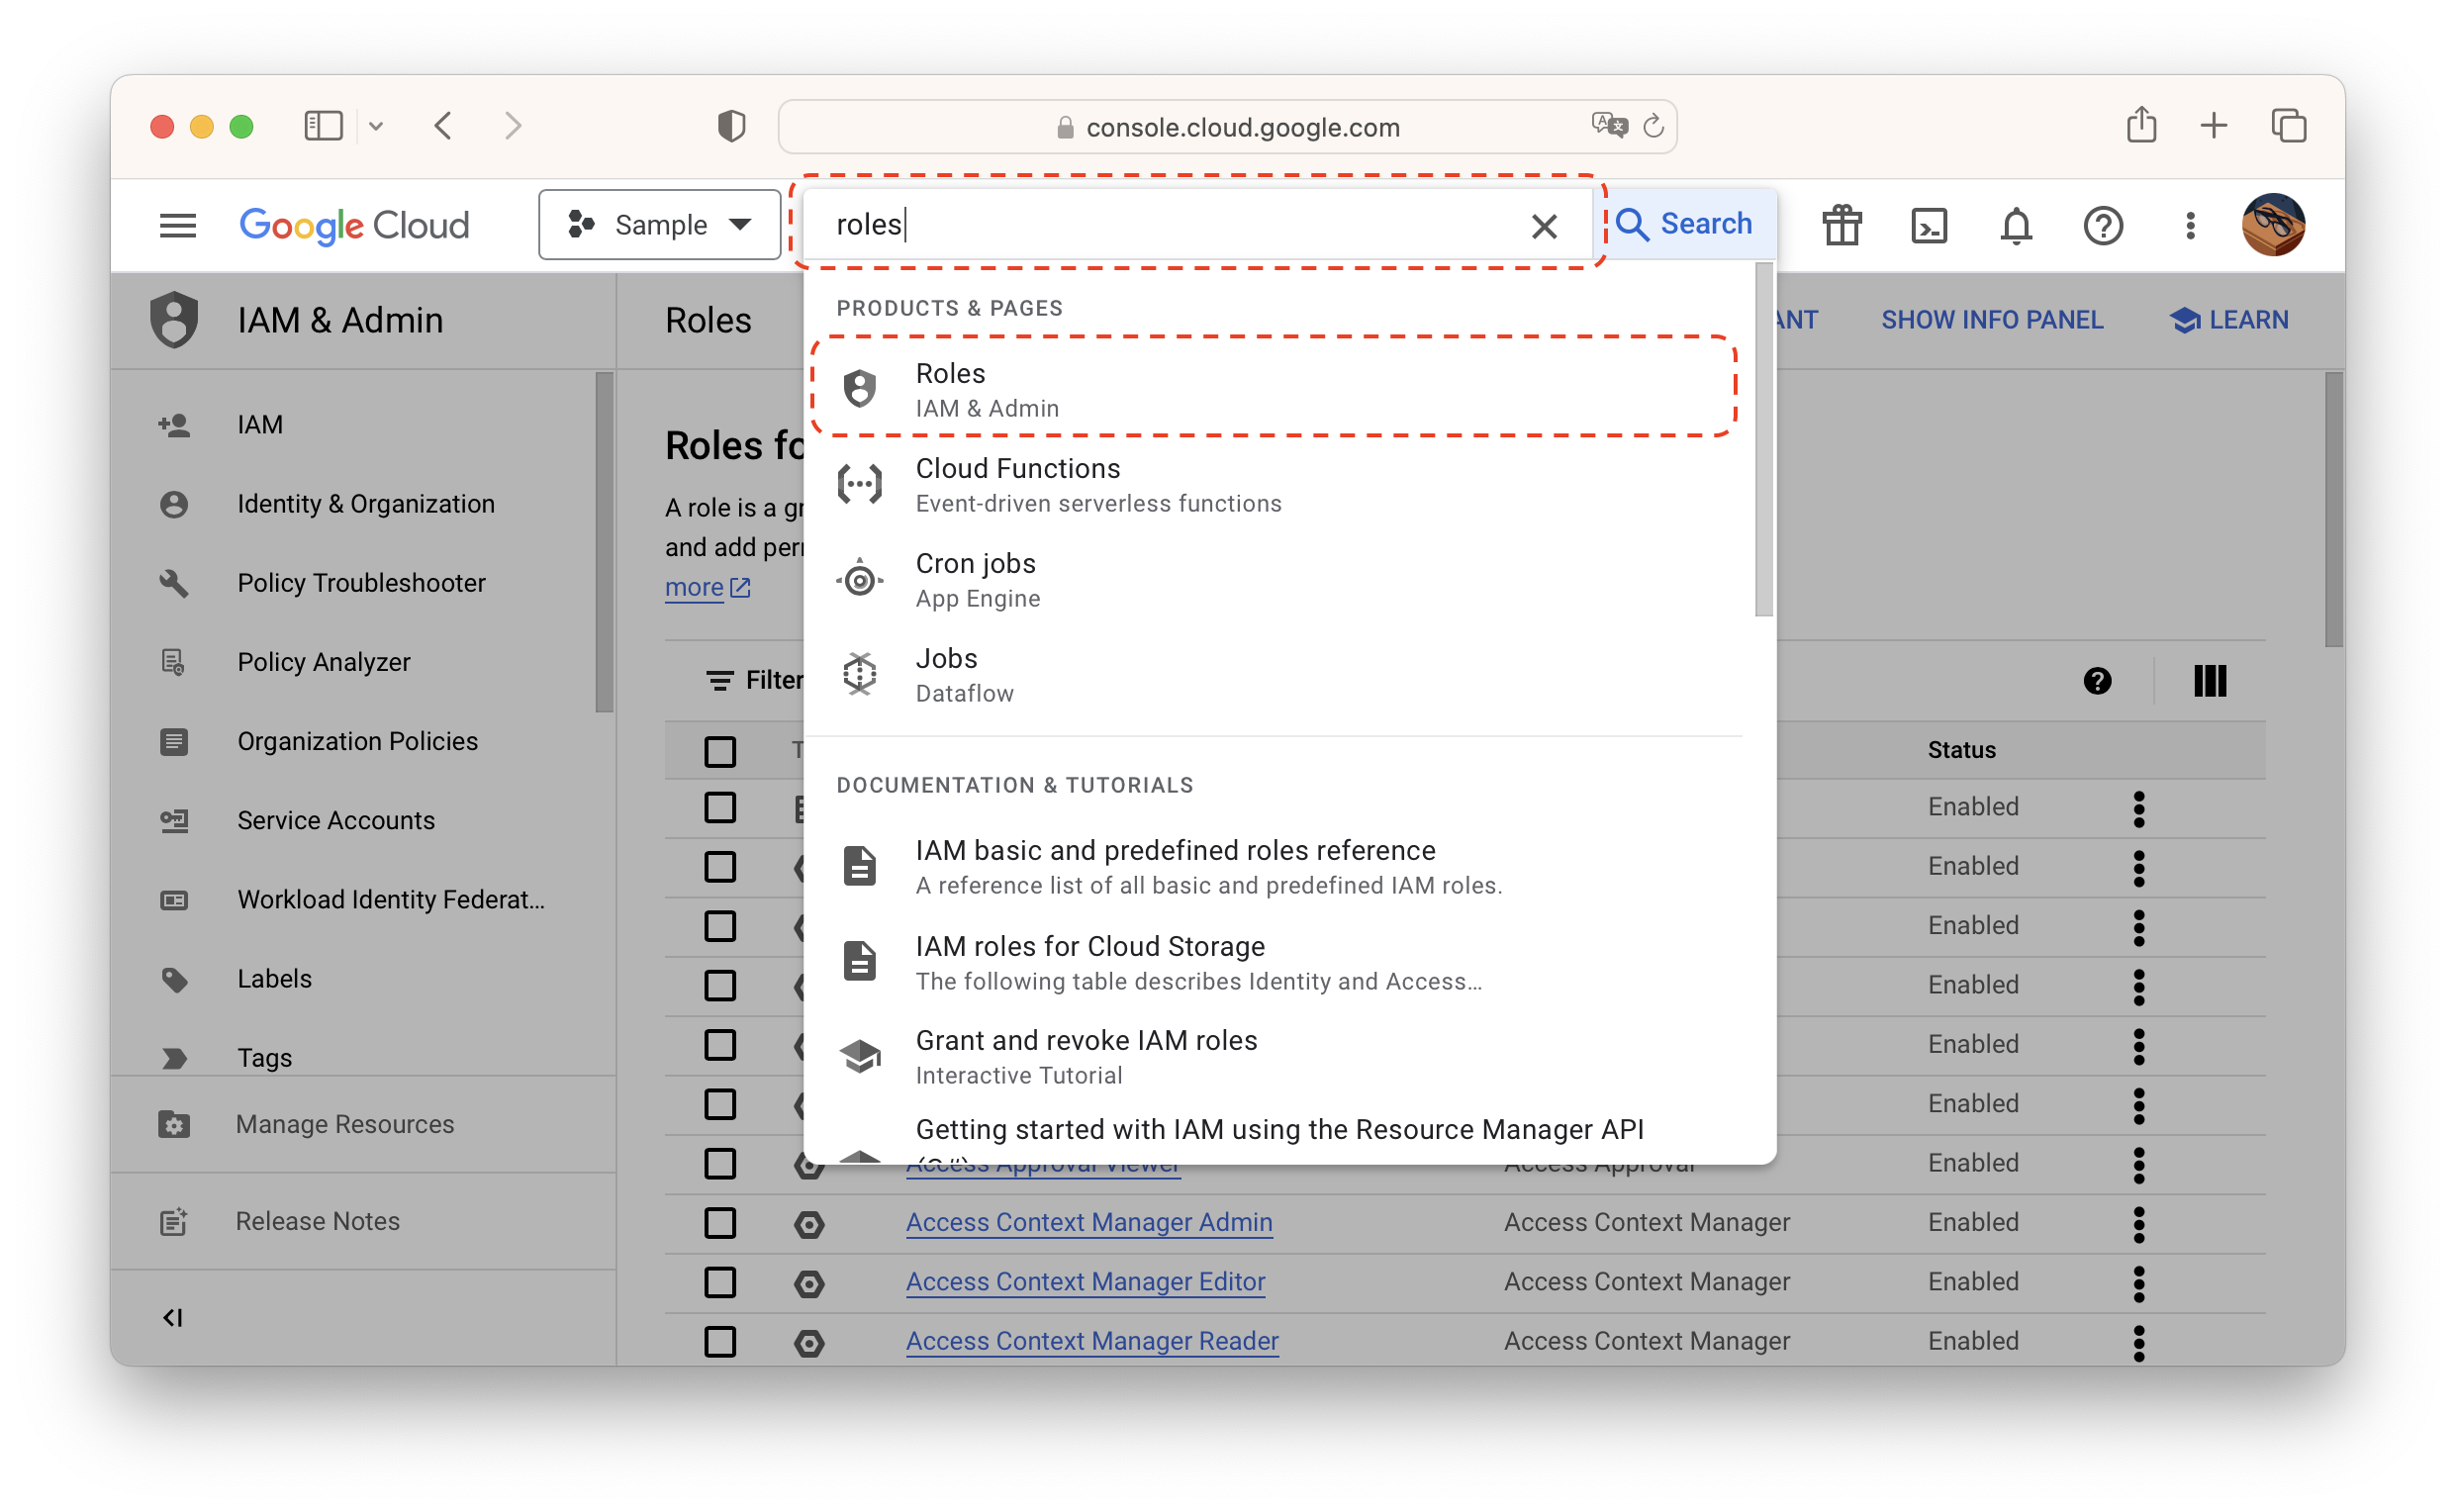
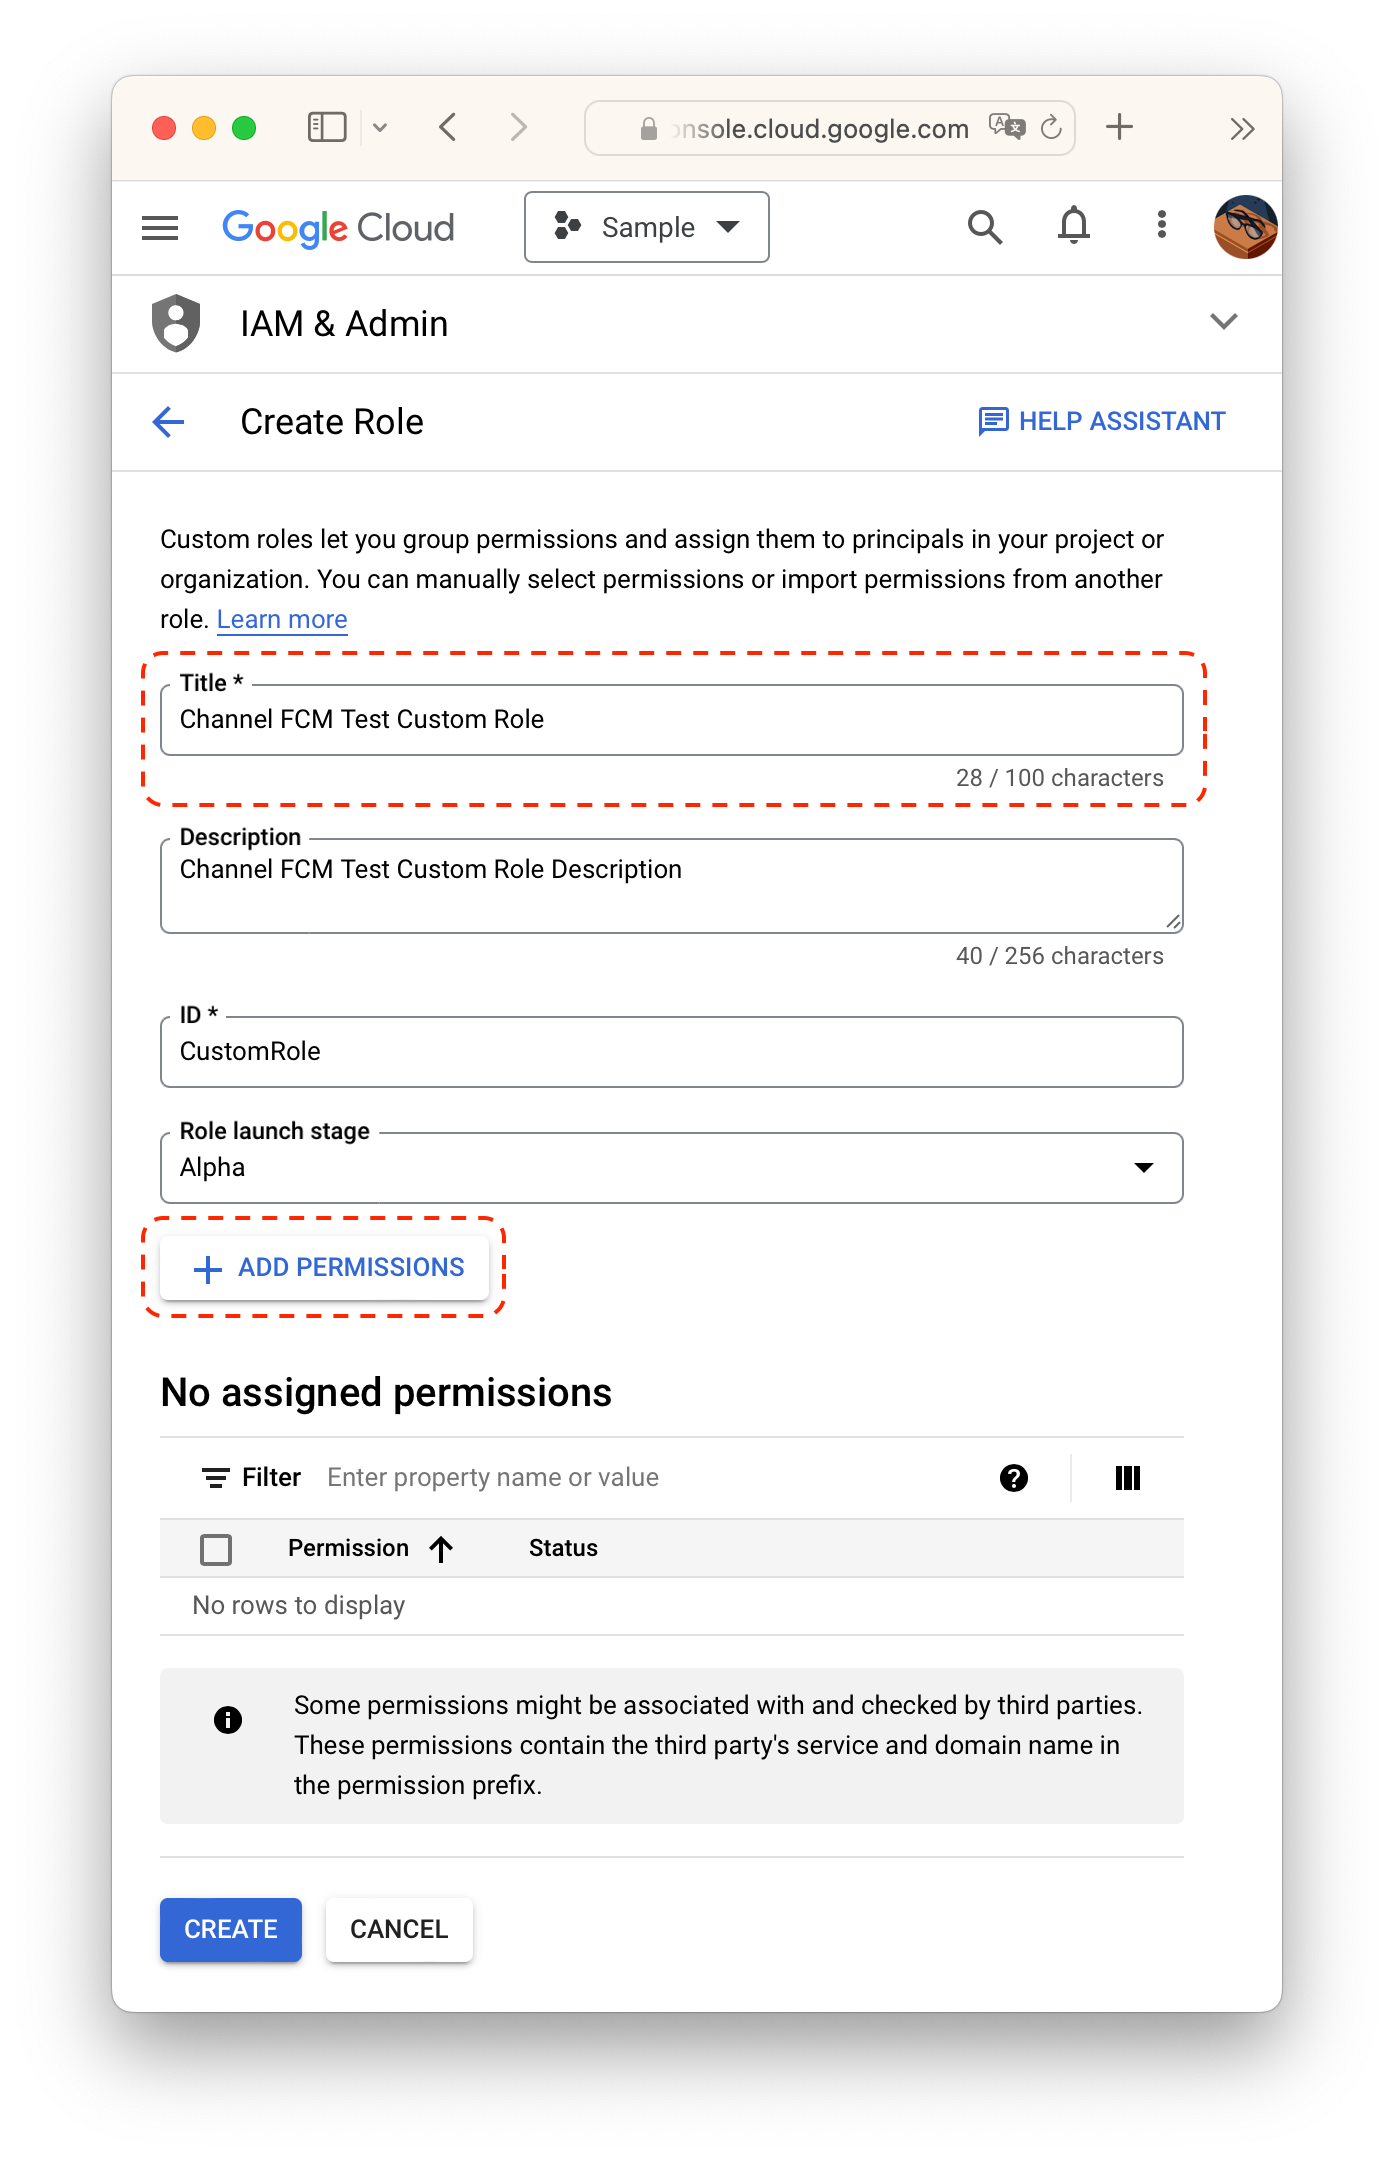
Prior to creating a service account, create a role. Navigate to Roles.
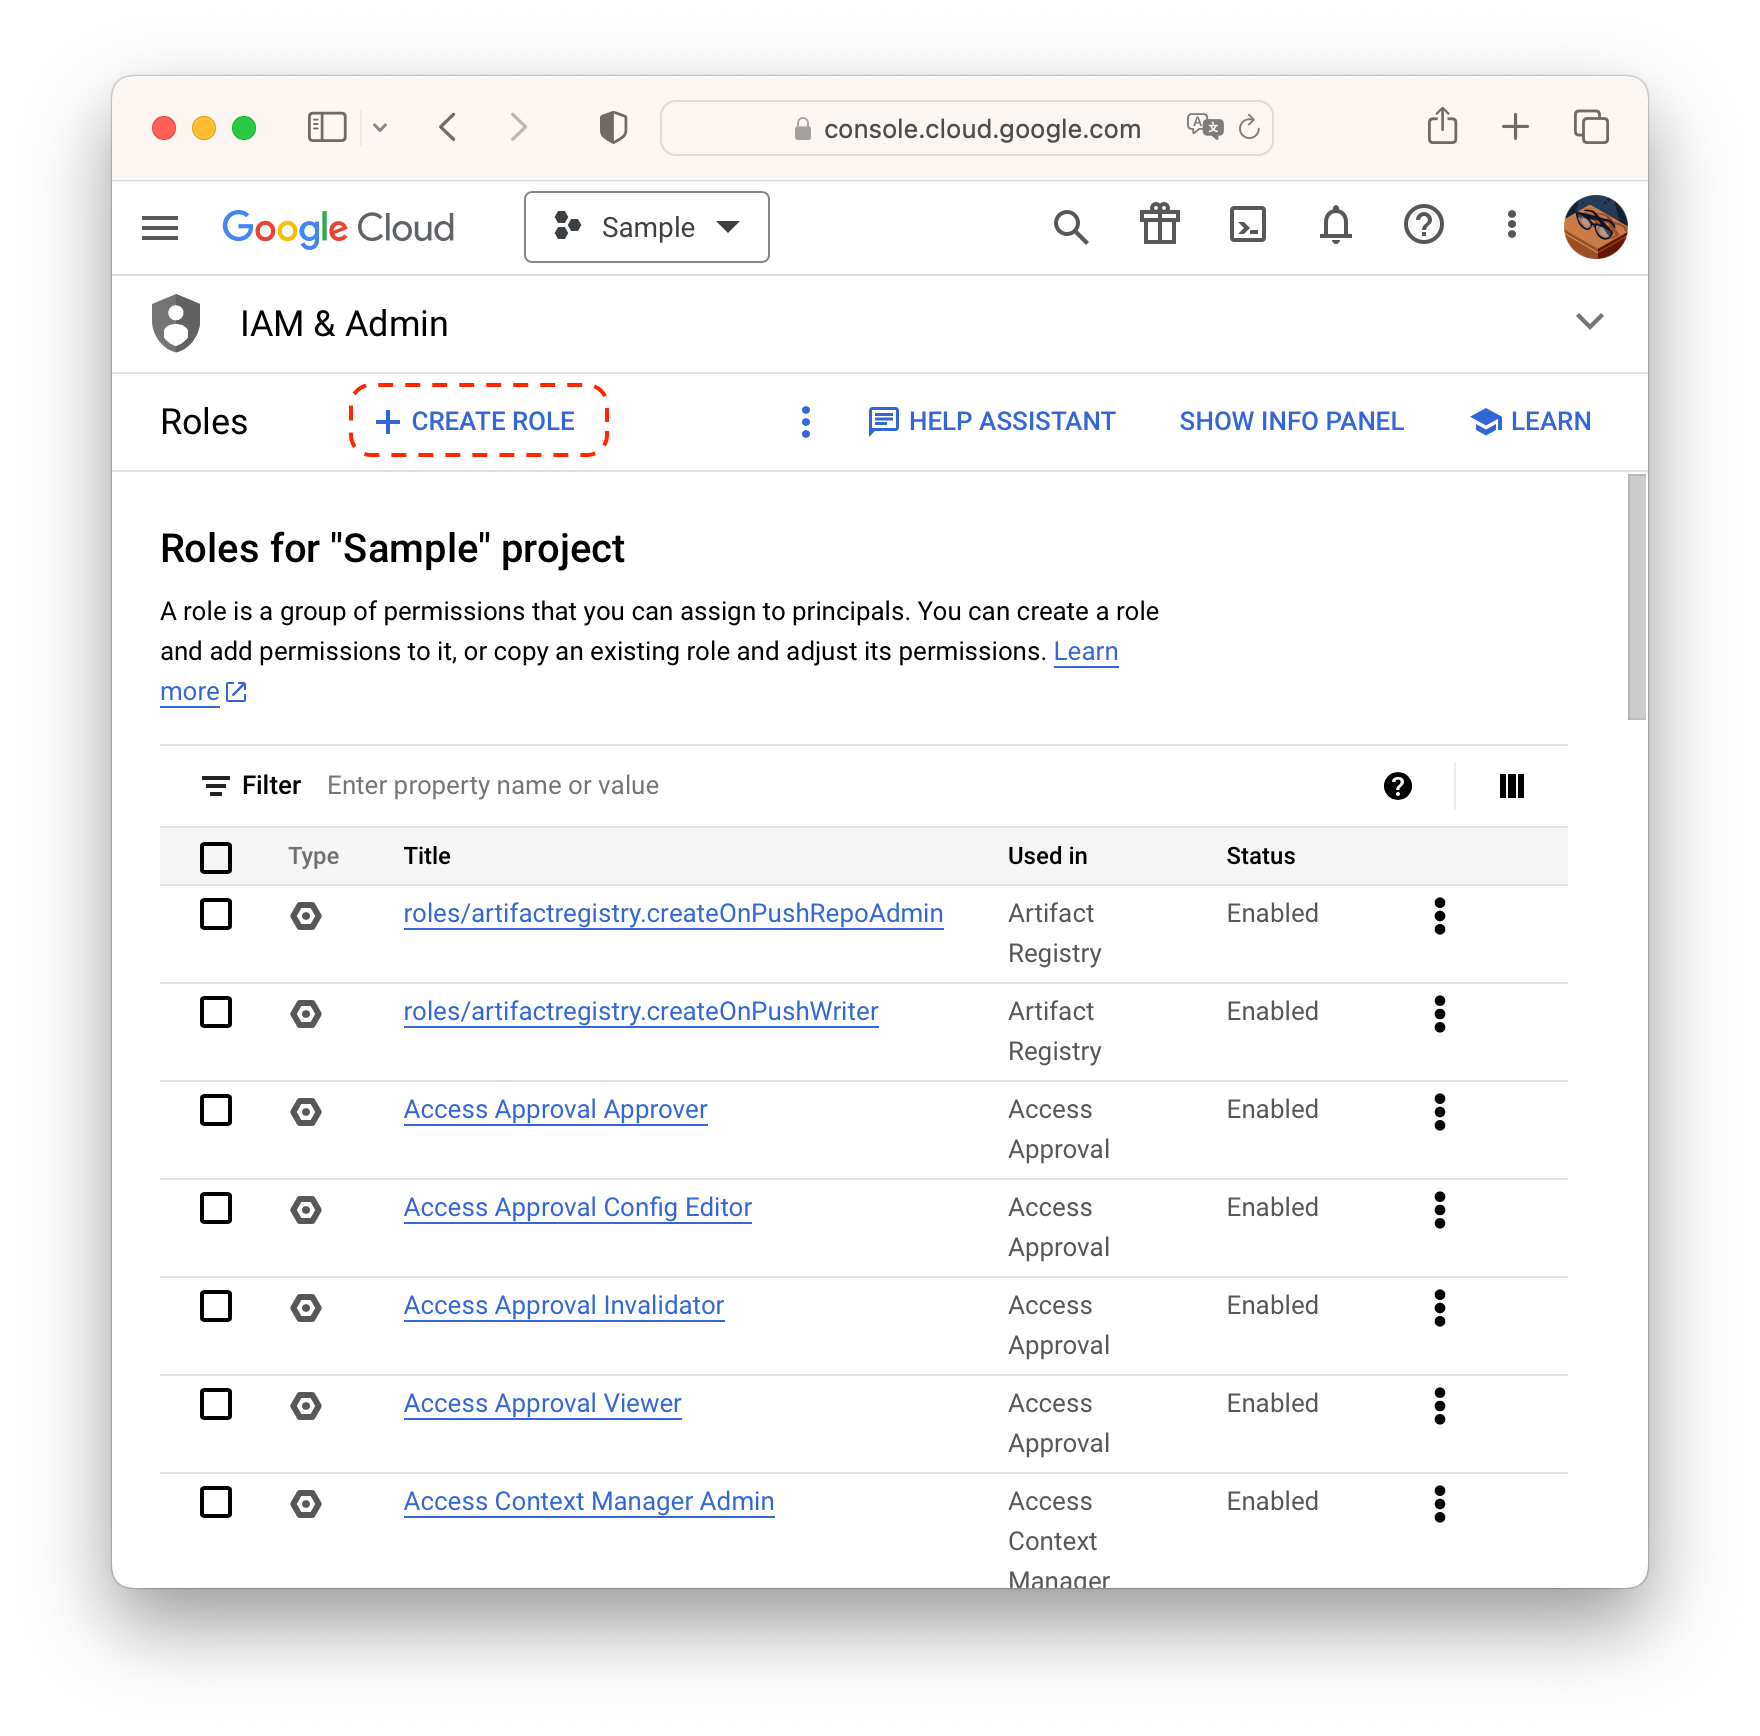
Click CREATE ROLE.
Fill in details and click ADD PERMISSIONS.
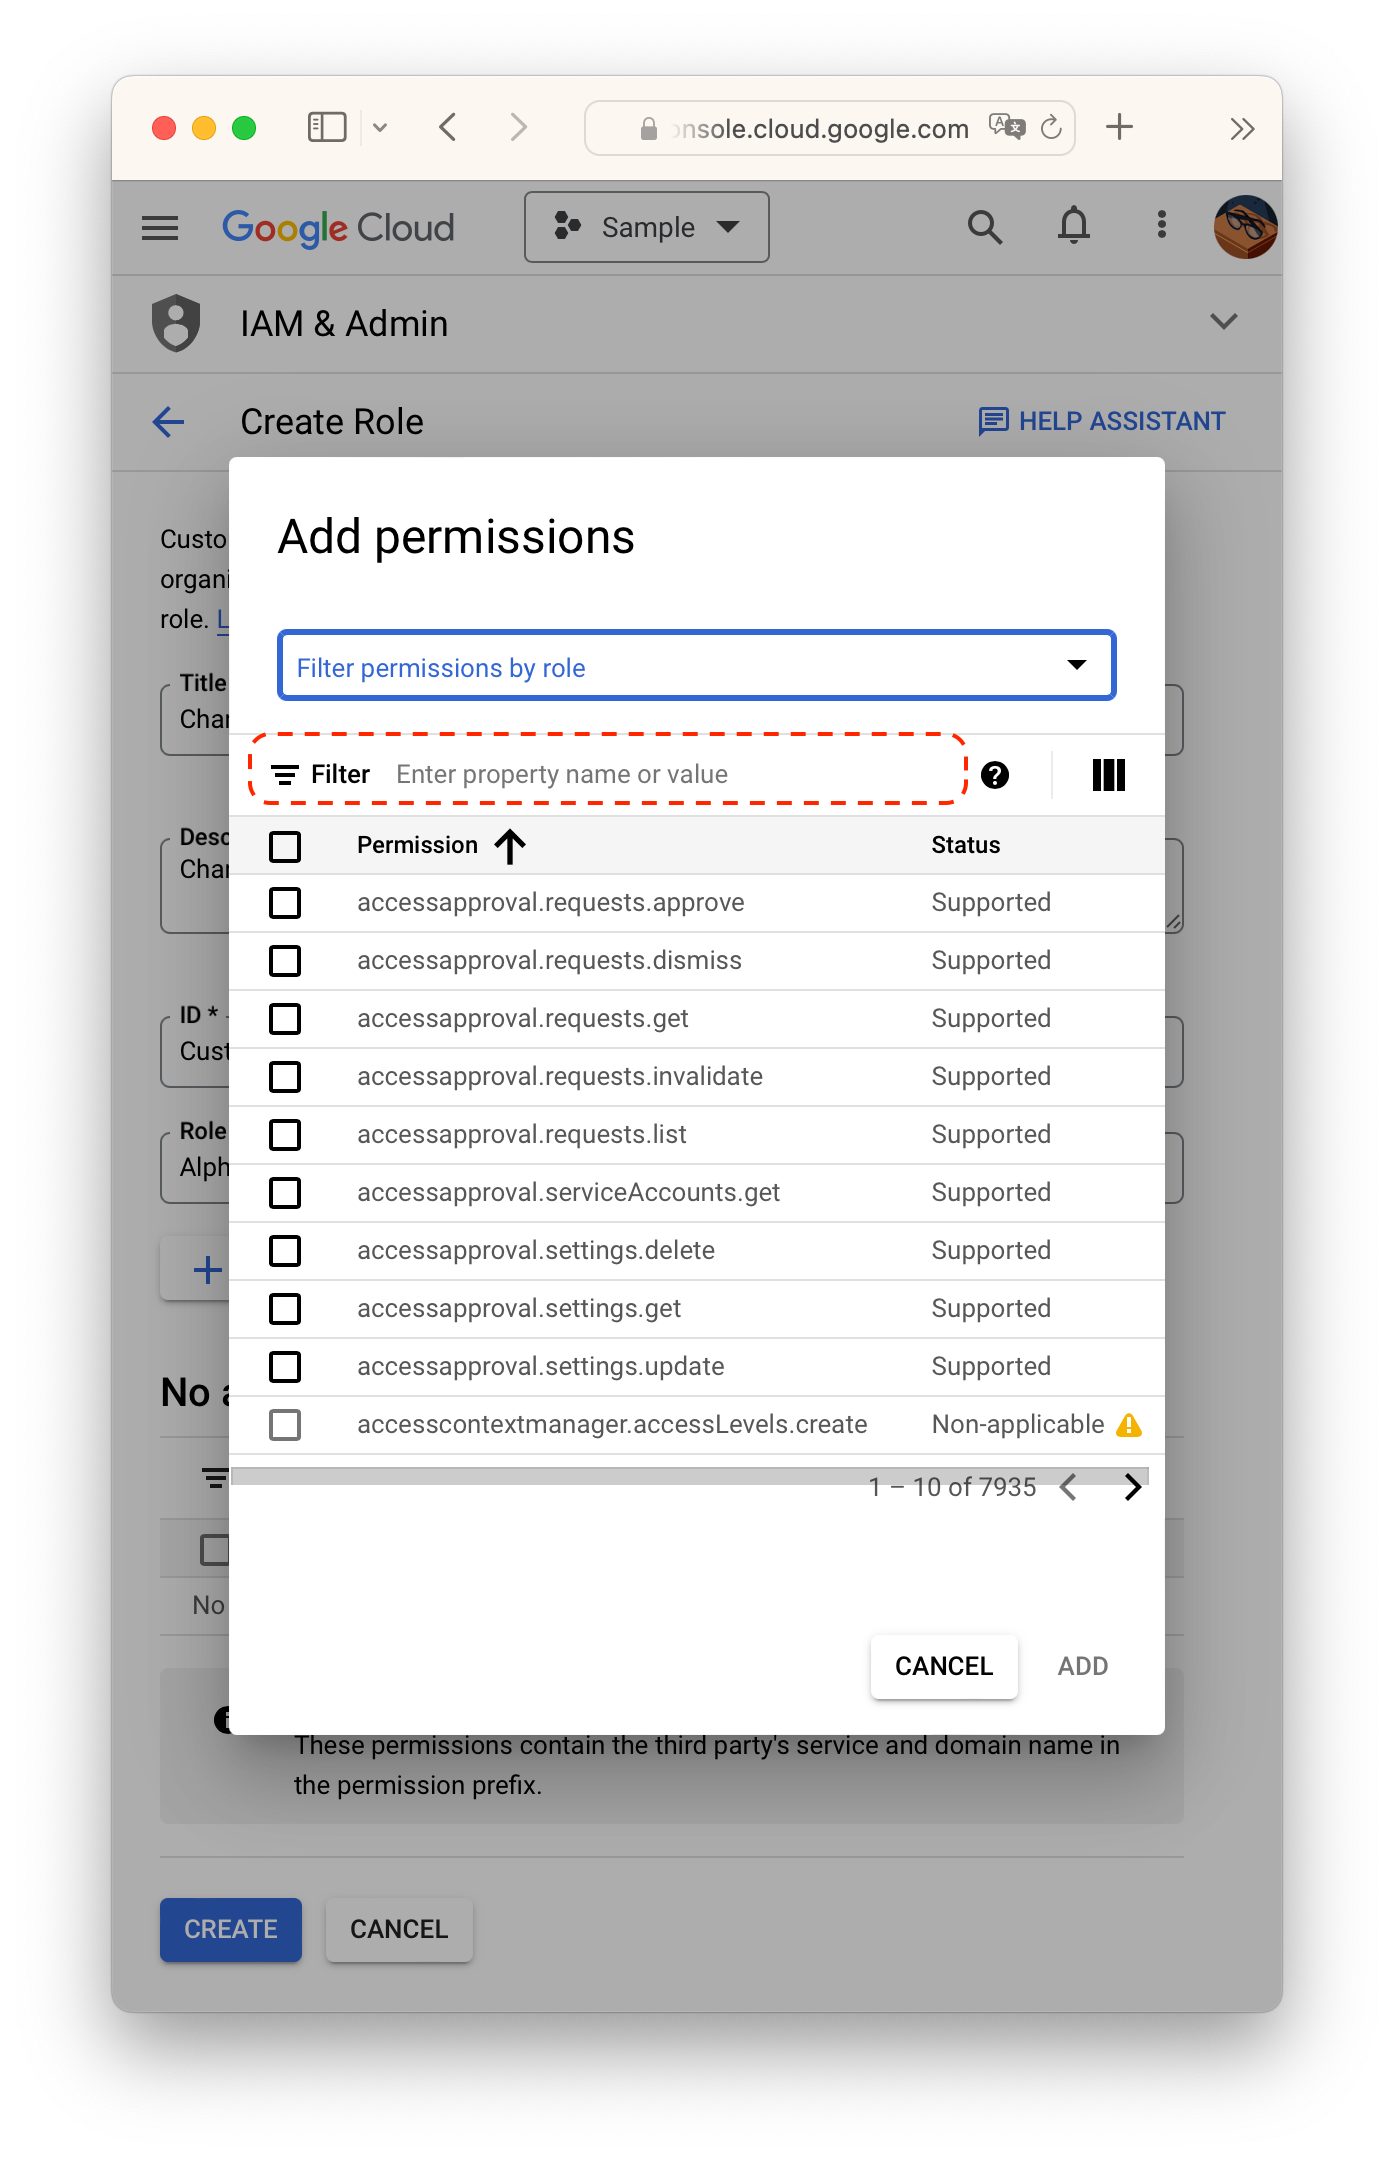
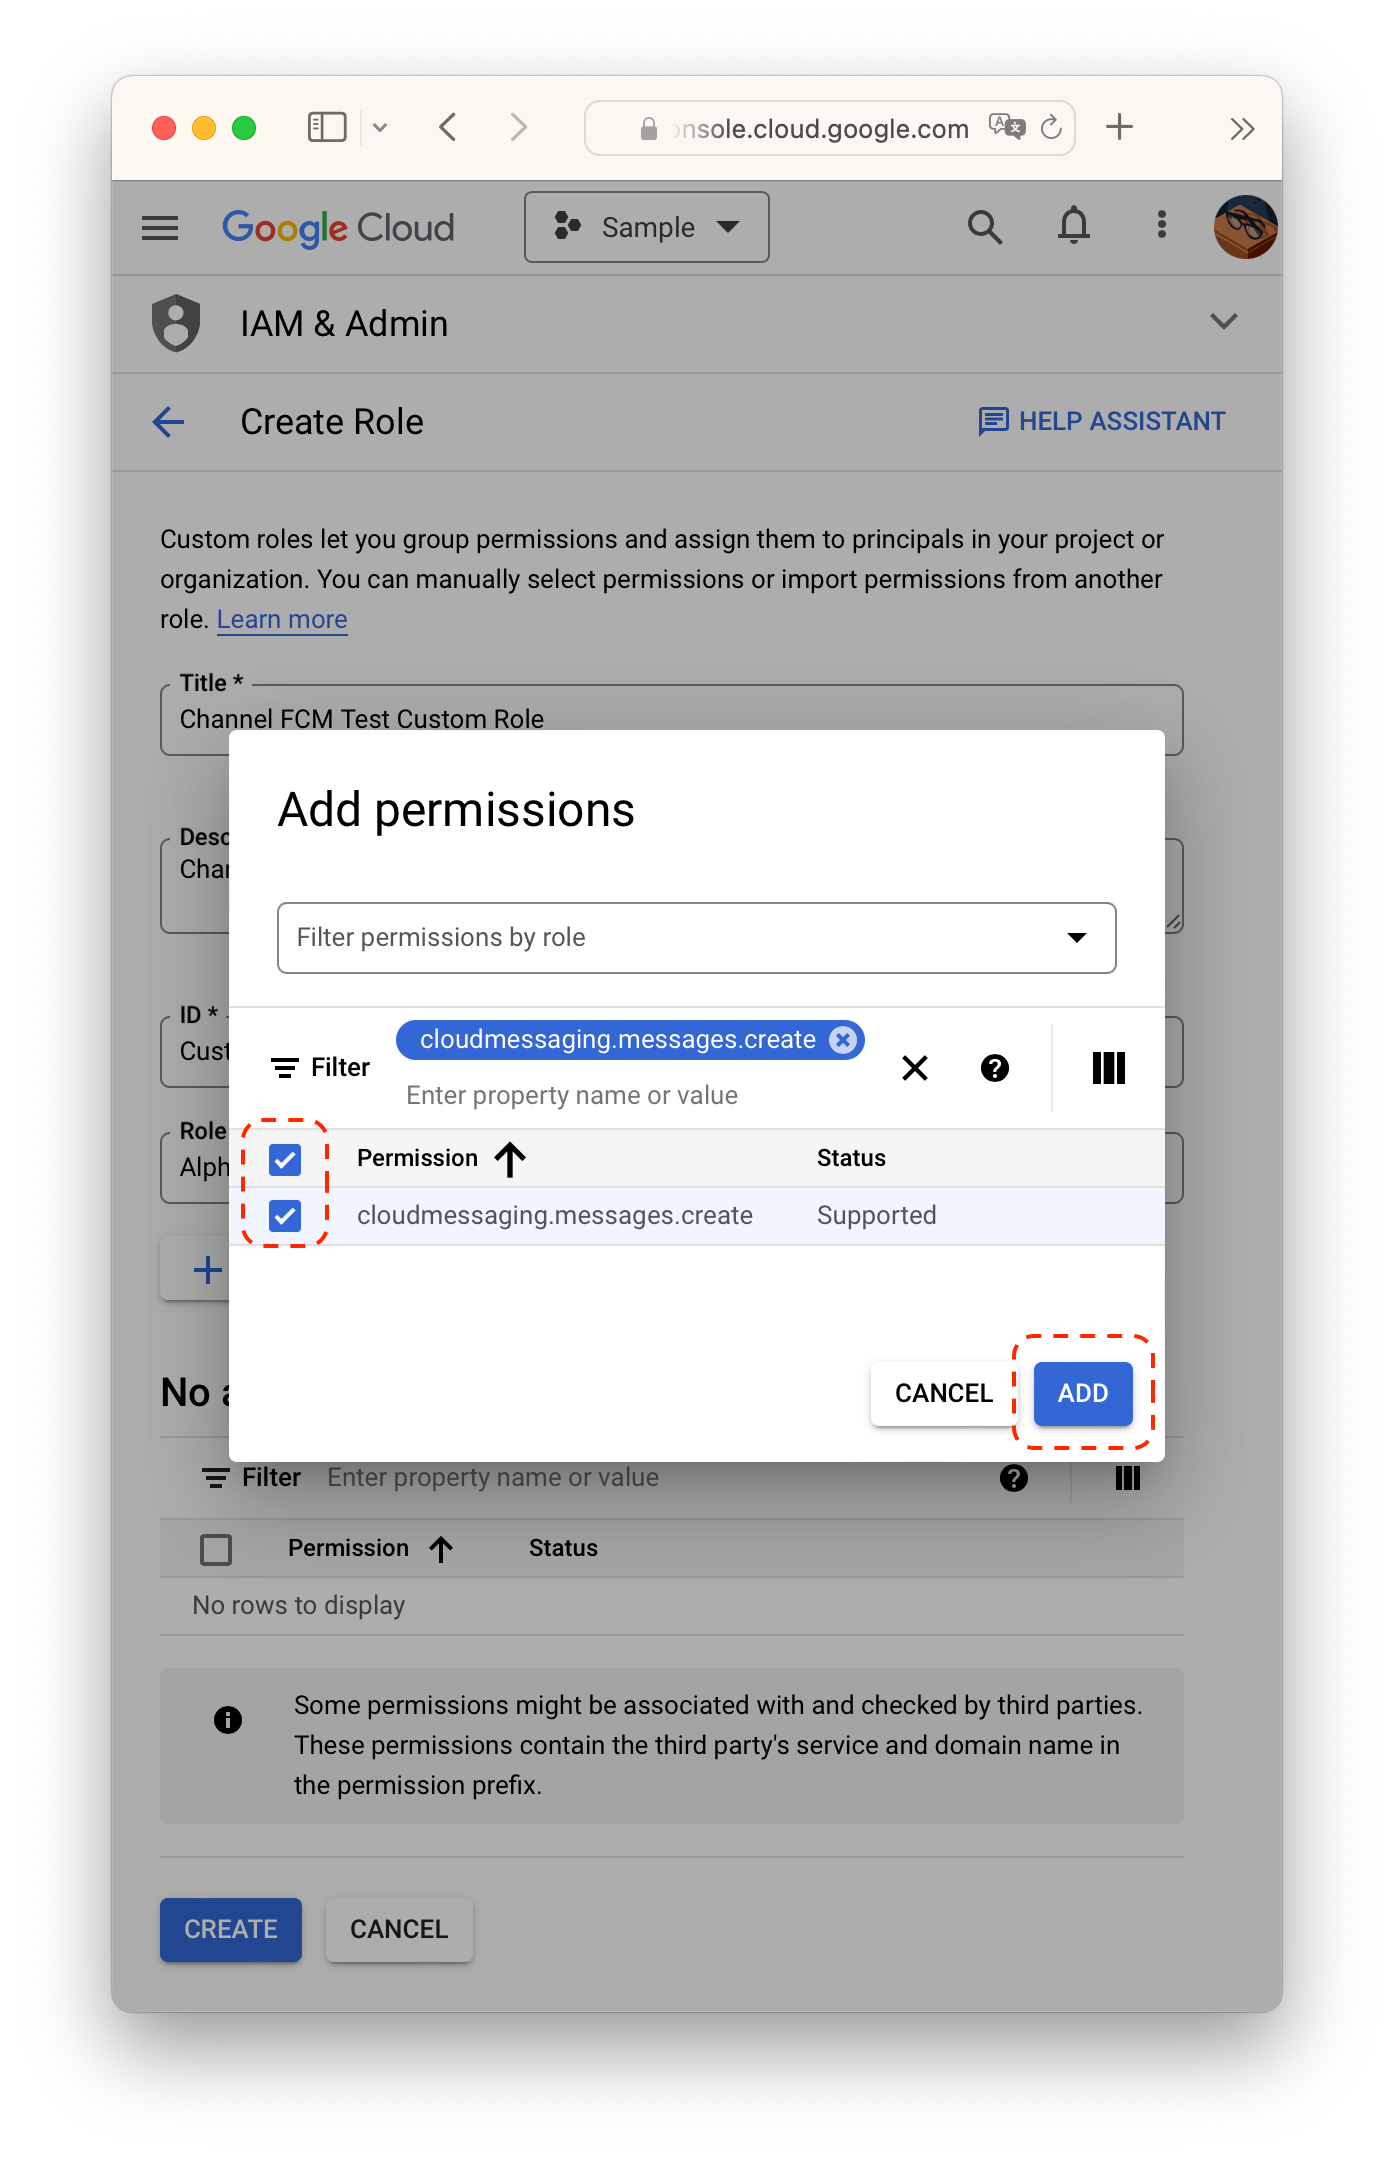
Create a role with cloudmessaging.messages.create permission. You can find it by keyword using filter. Make sure you are typing keywords to "Enter property name or value" field NOT "Filter permissions by role."
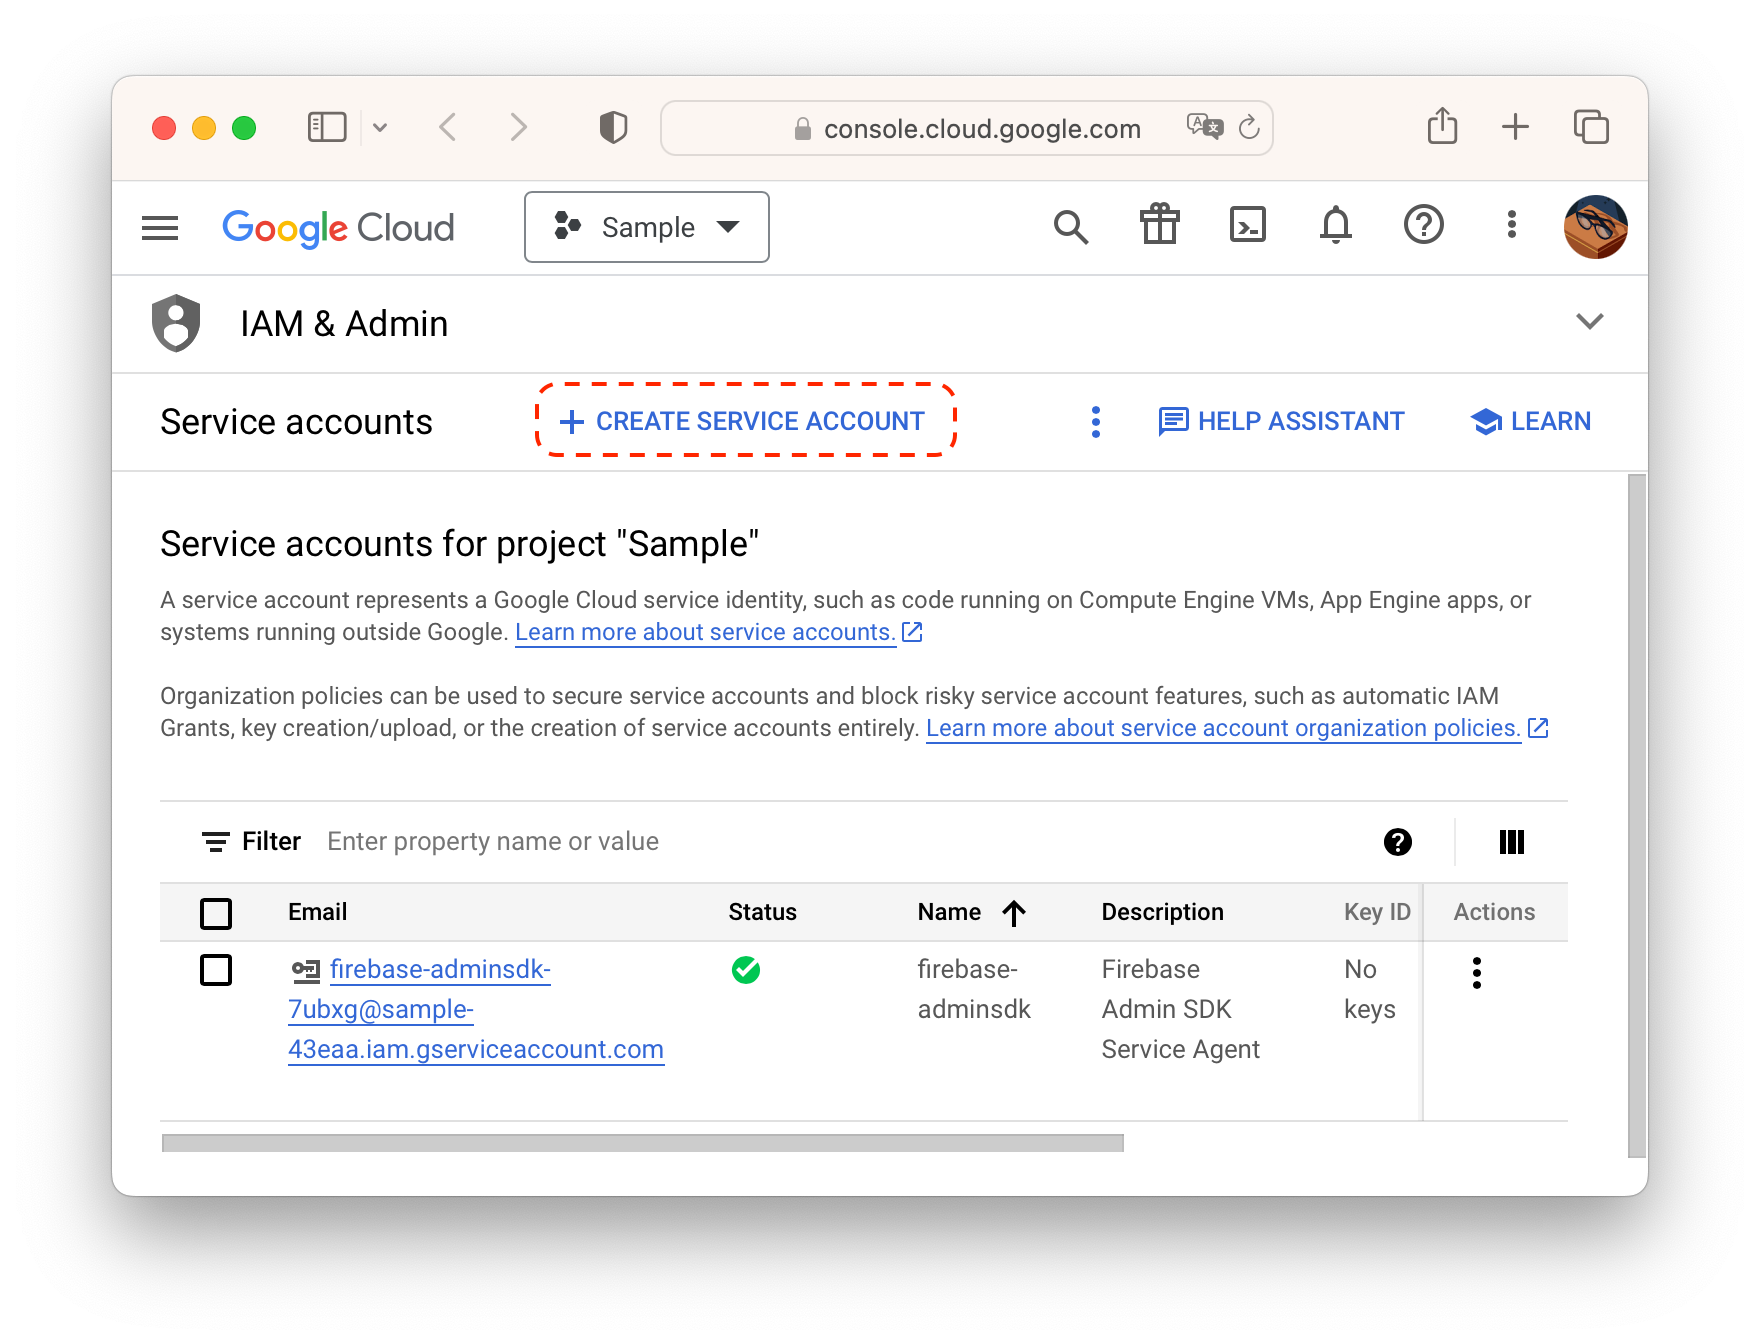
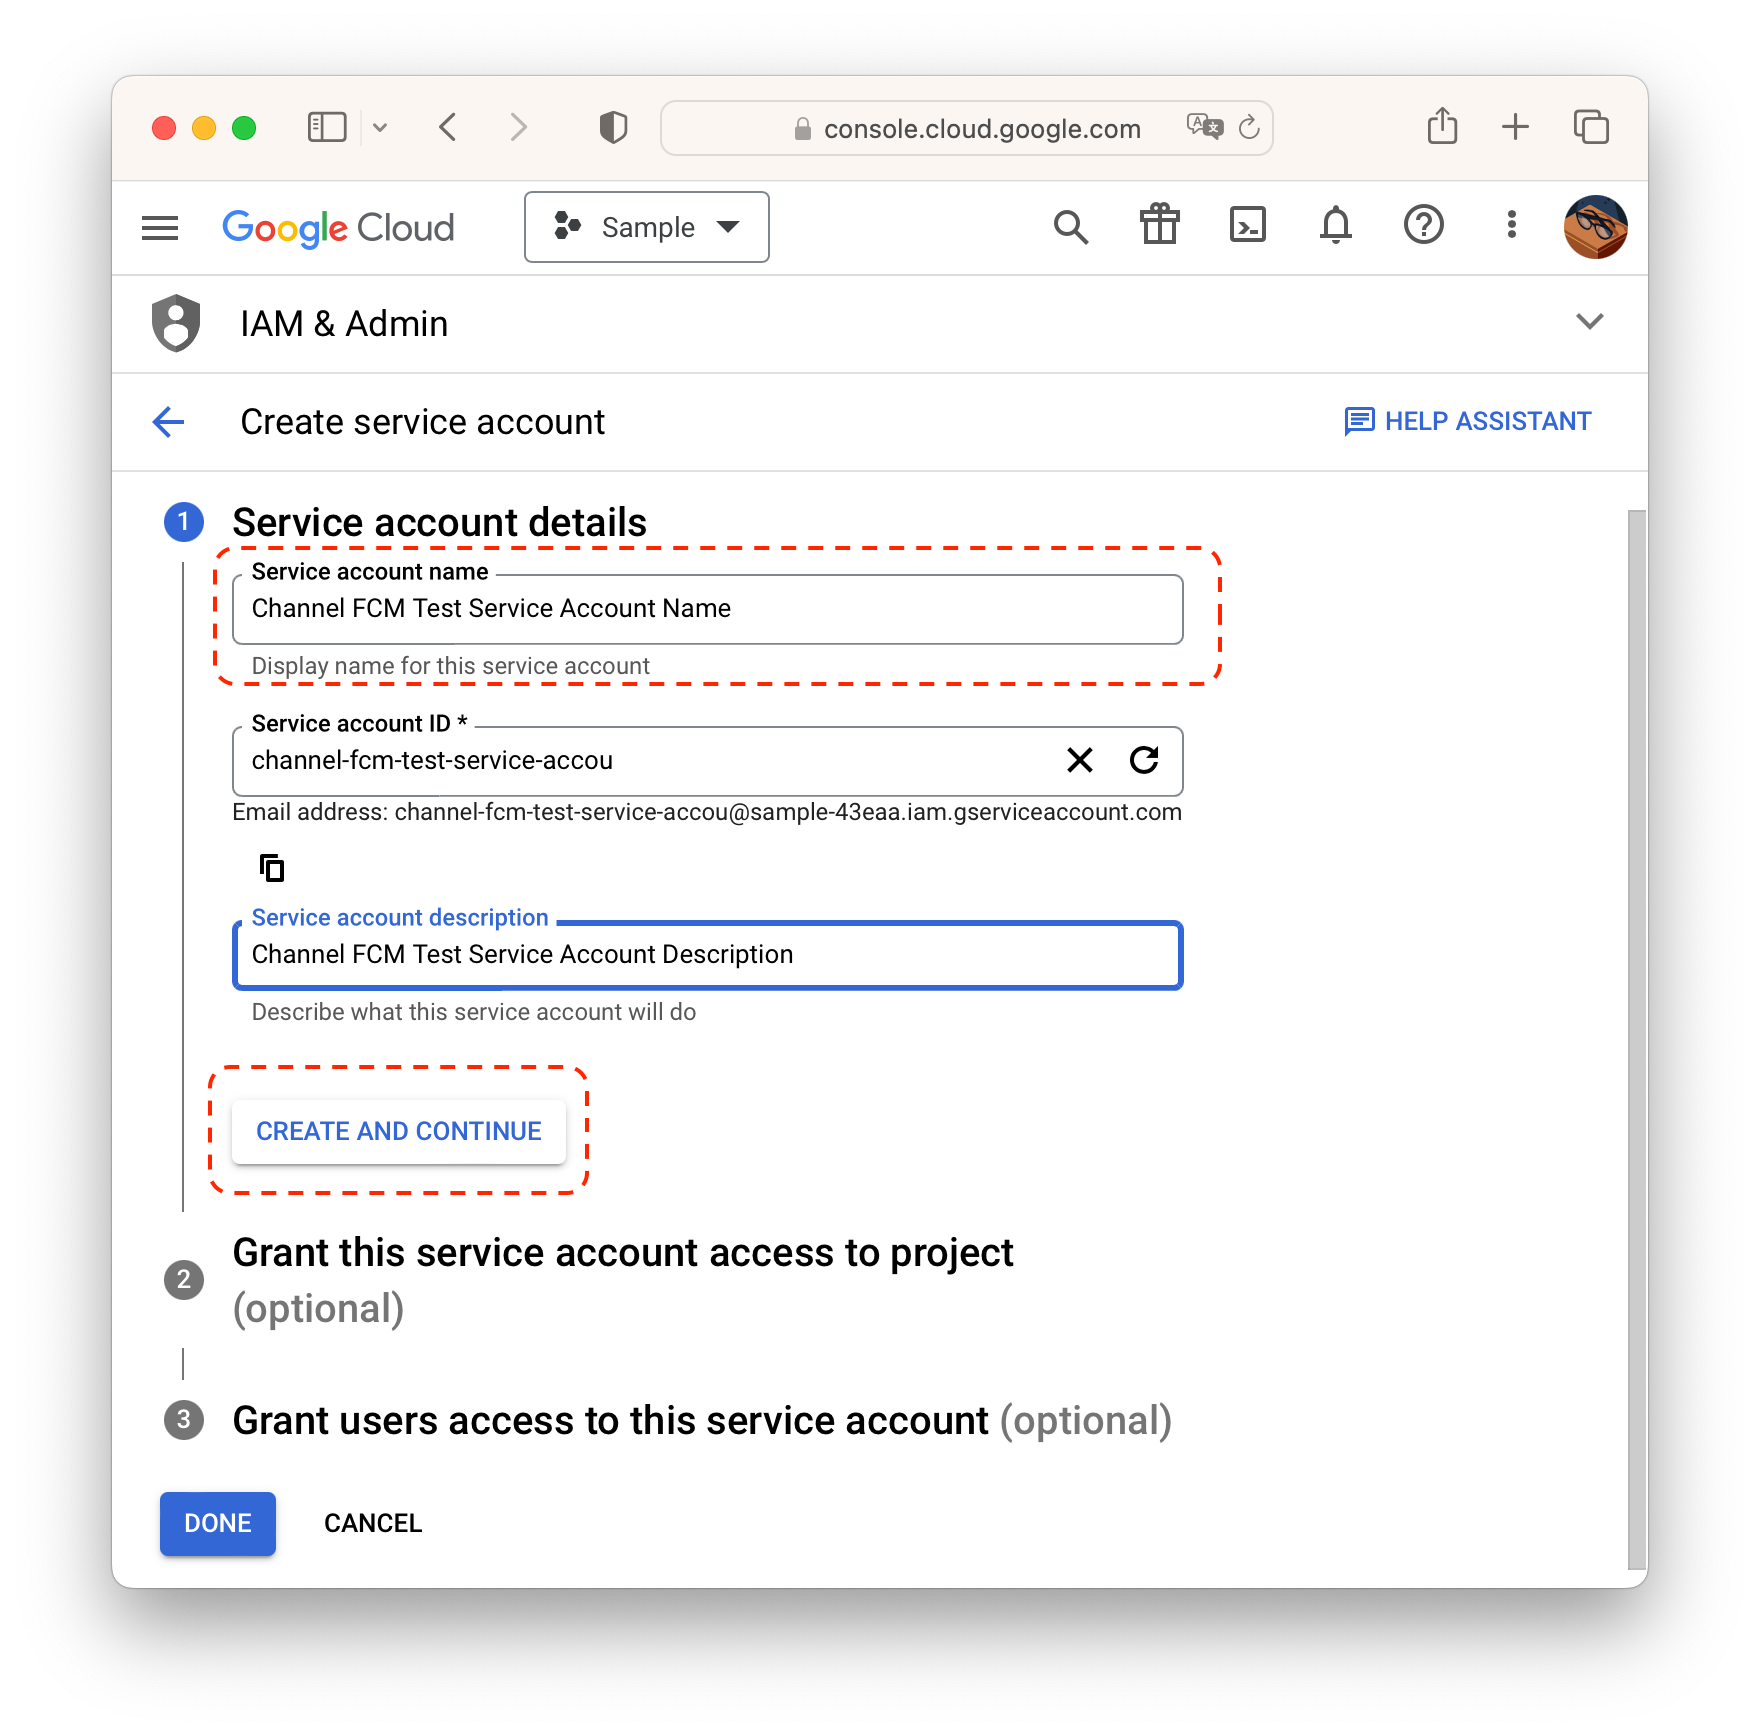
Navigate back to service accounts page and click CREATE SERVICE ACCOUNT.
Fill in details and click CREATE AND CONTINUE.
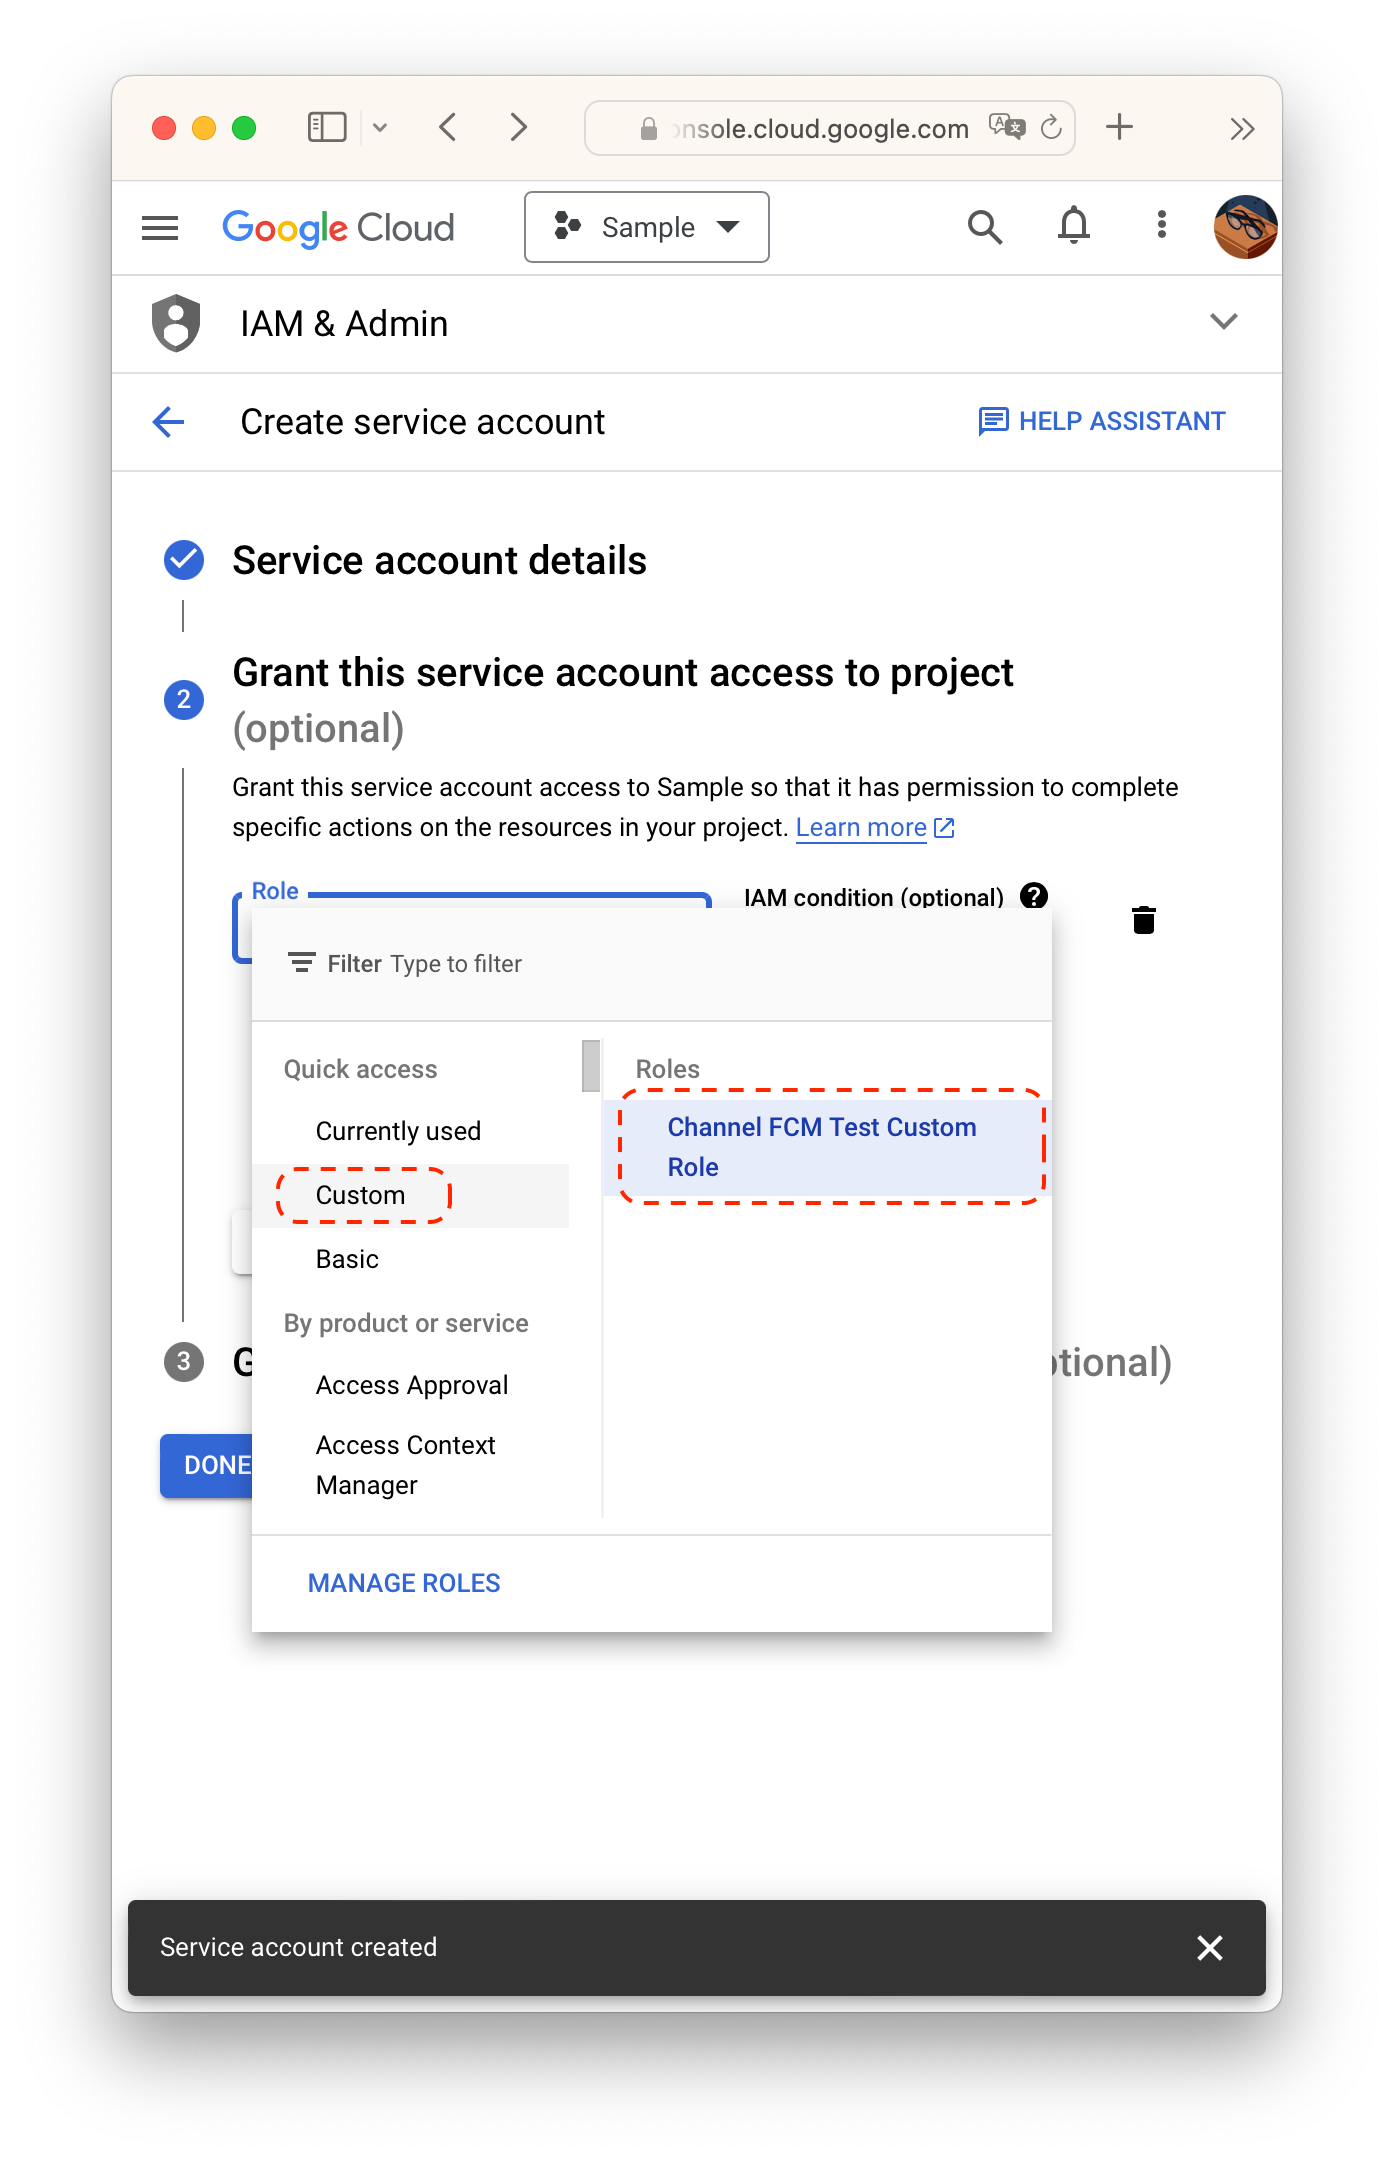
Click Select a role.
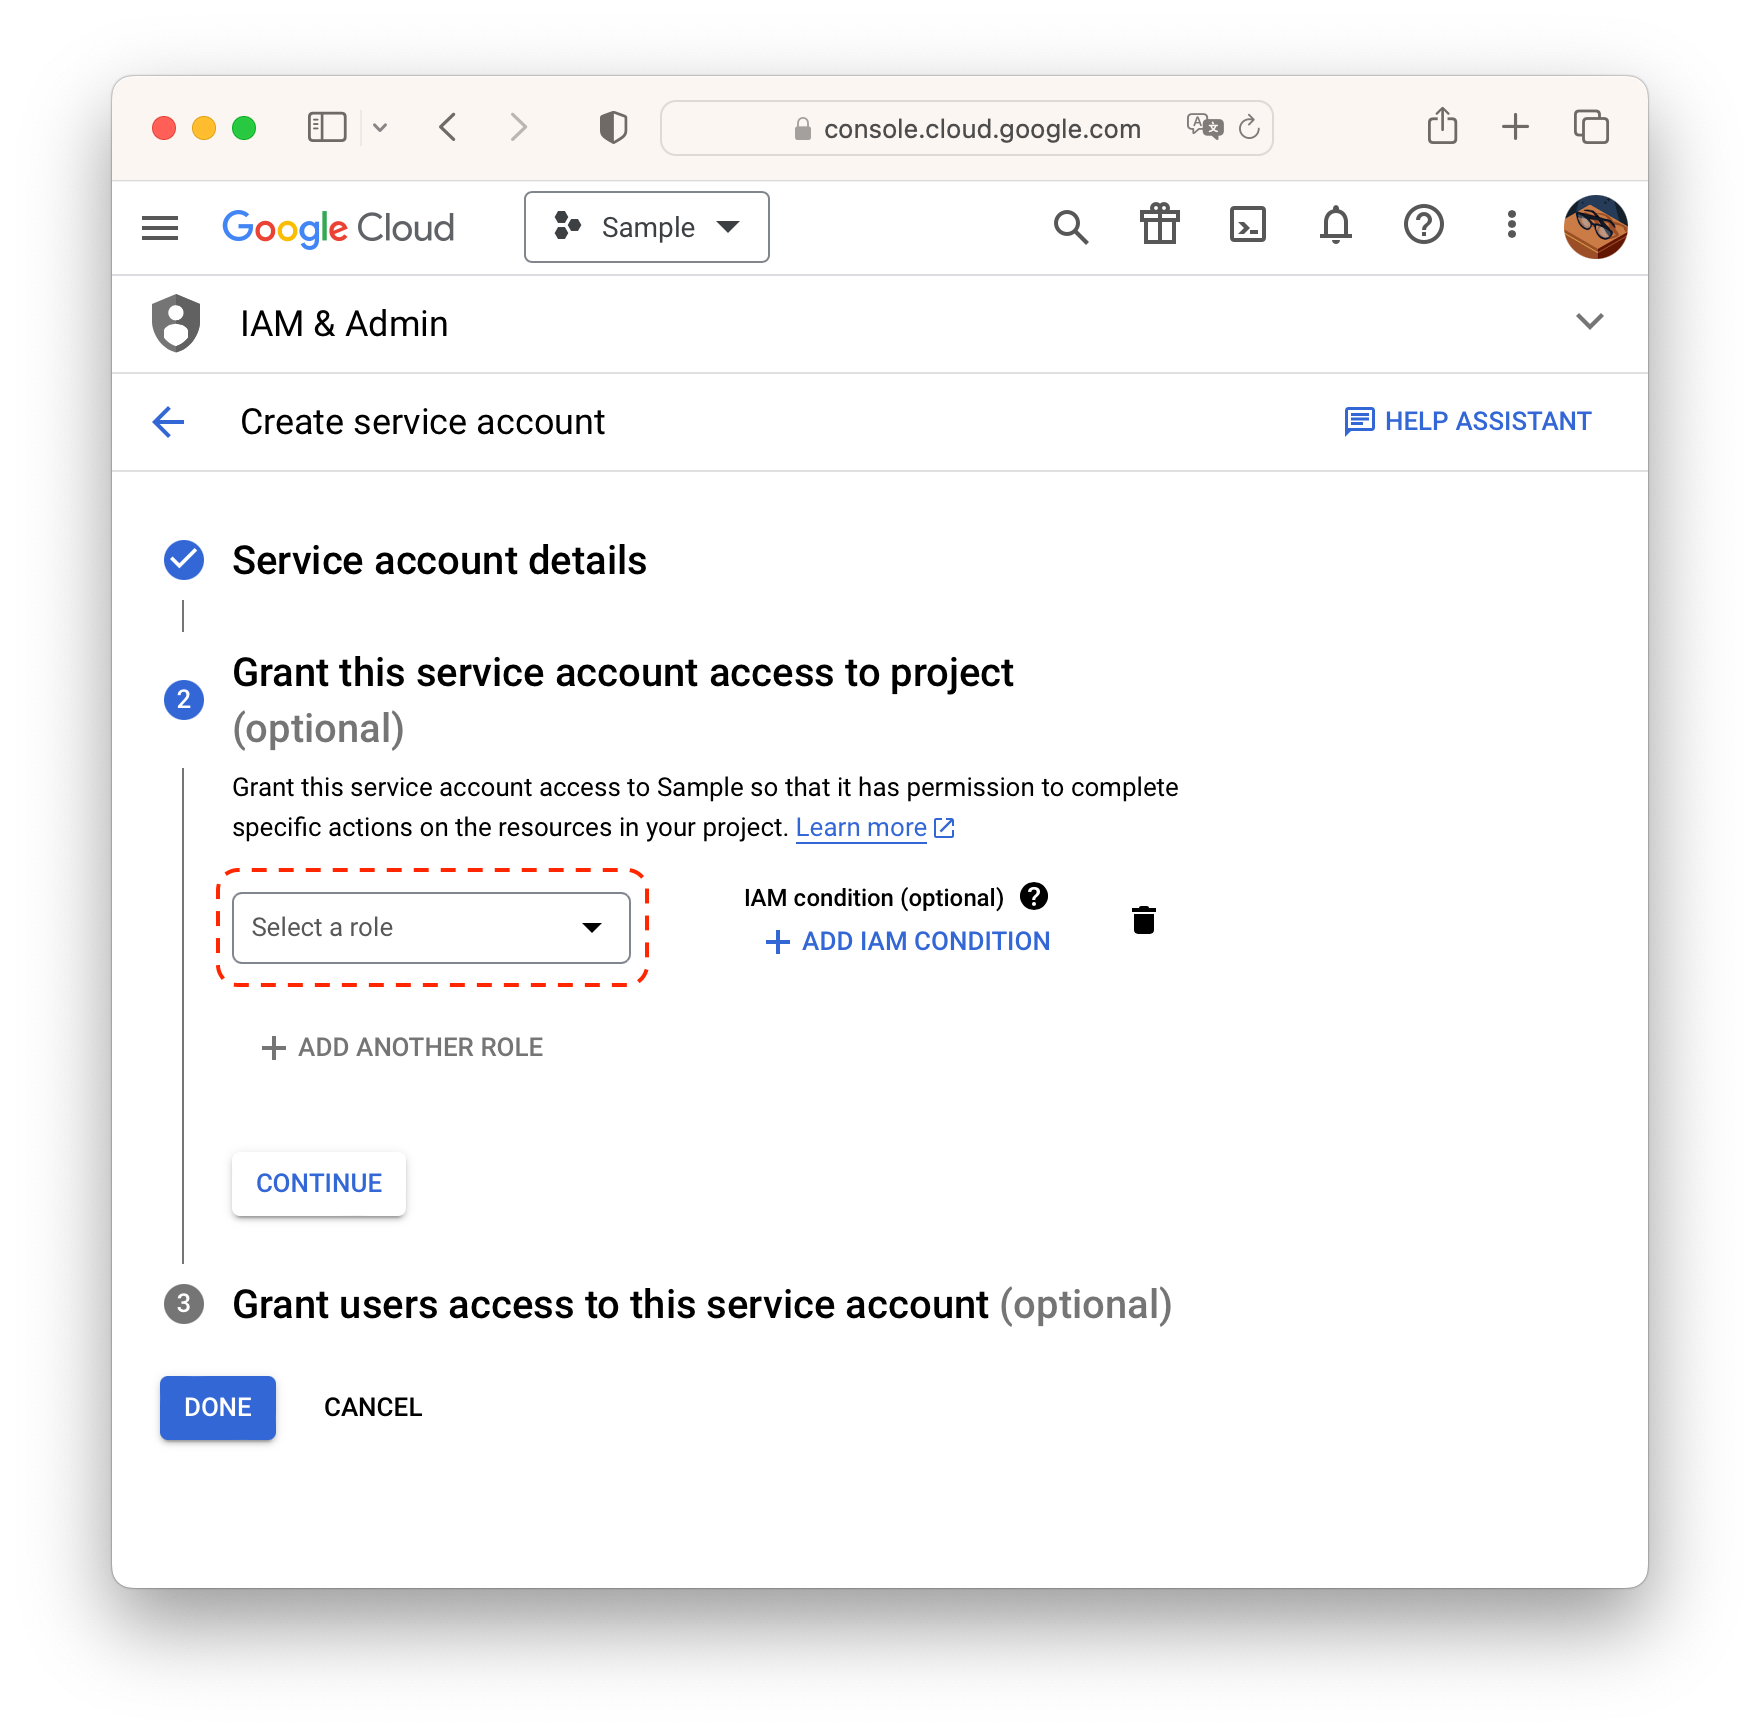
Select a role created at step 6.
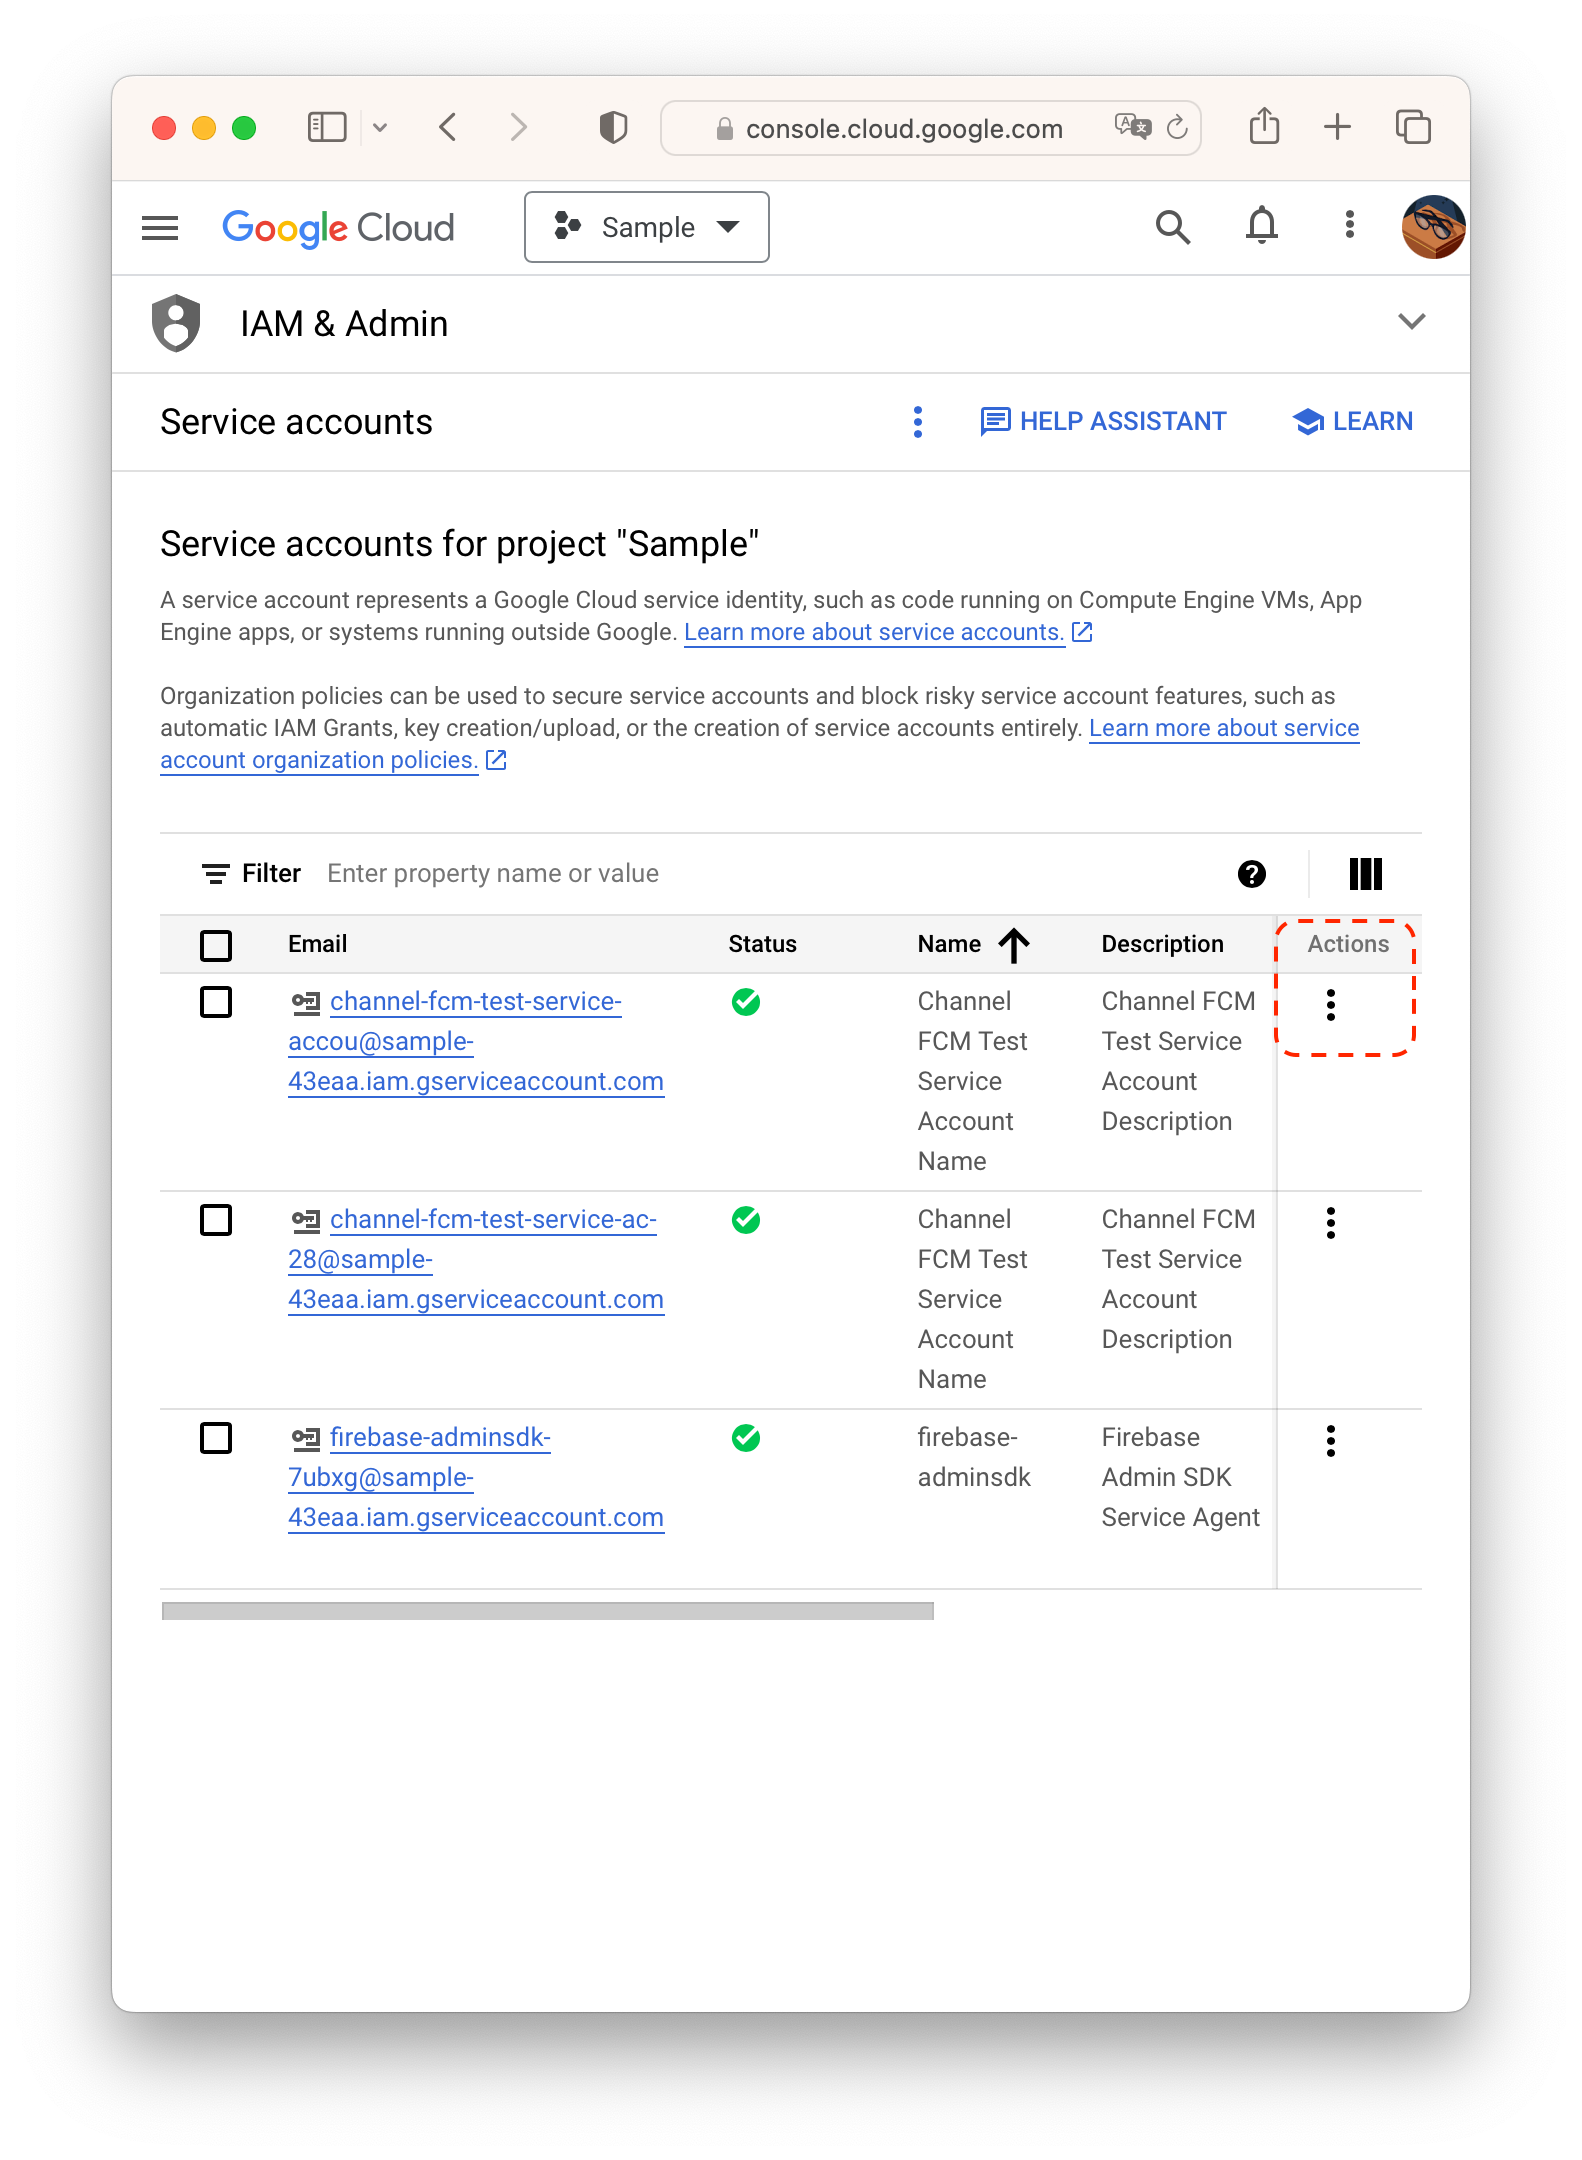
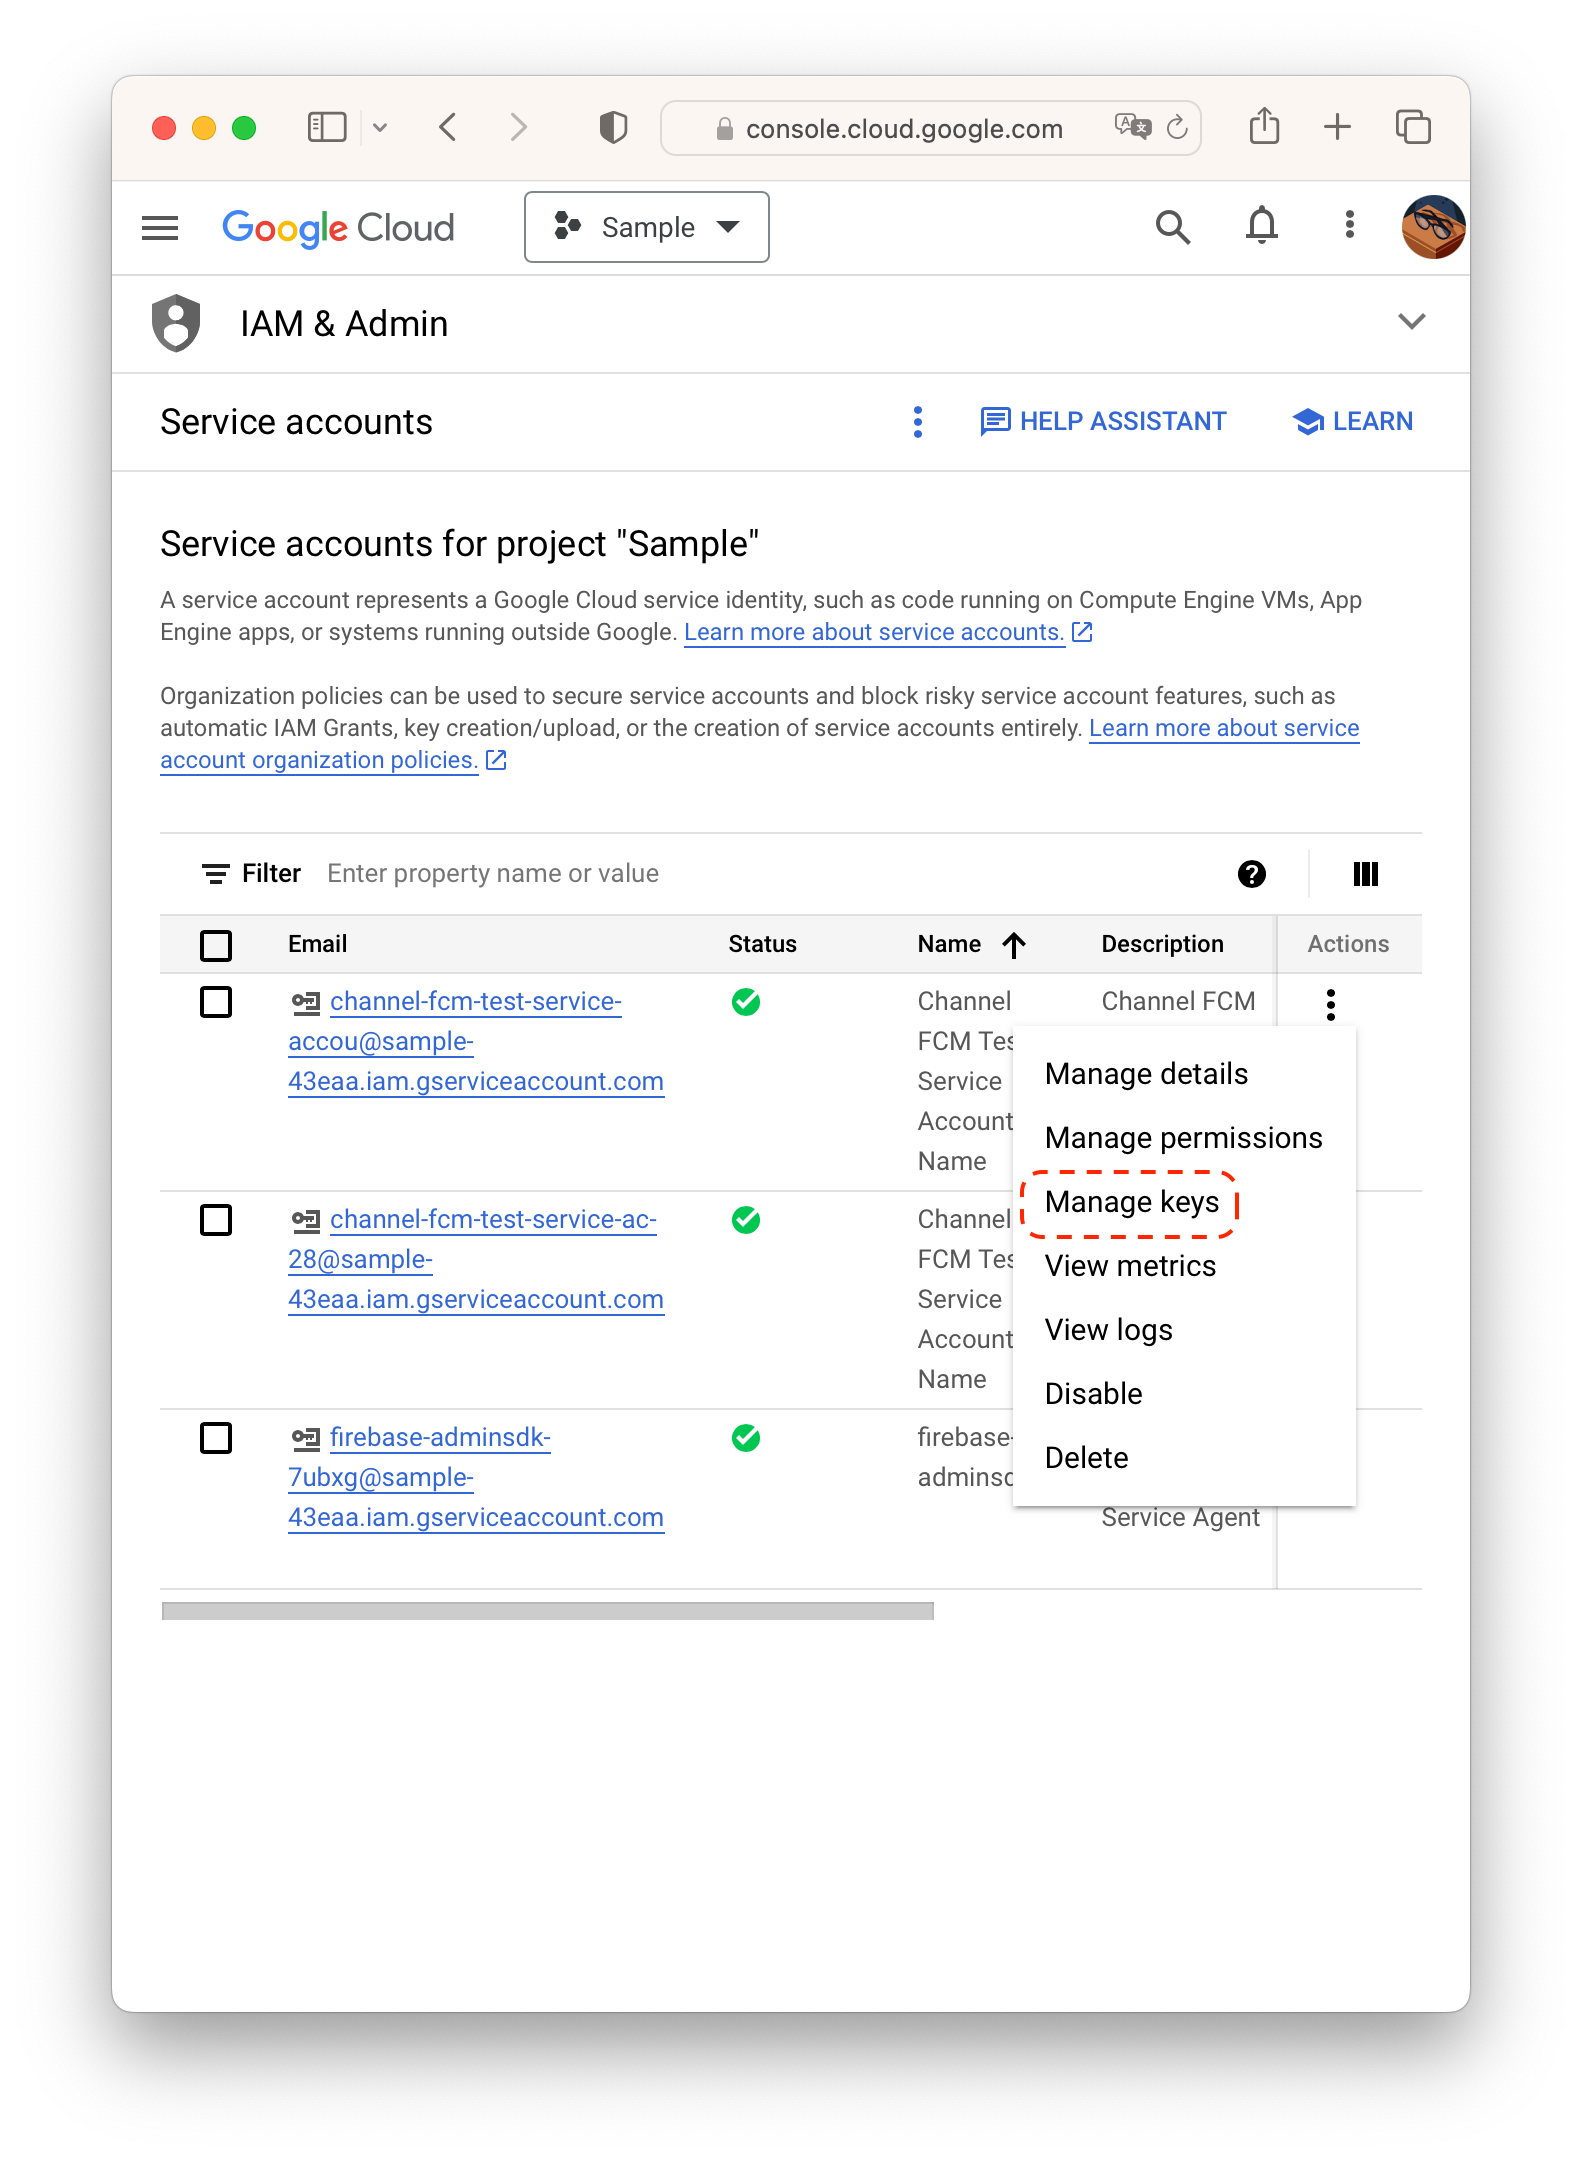
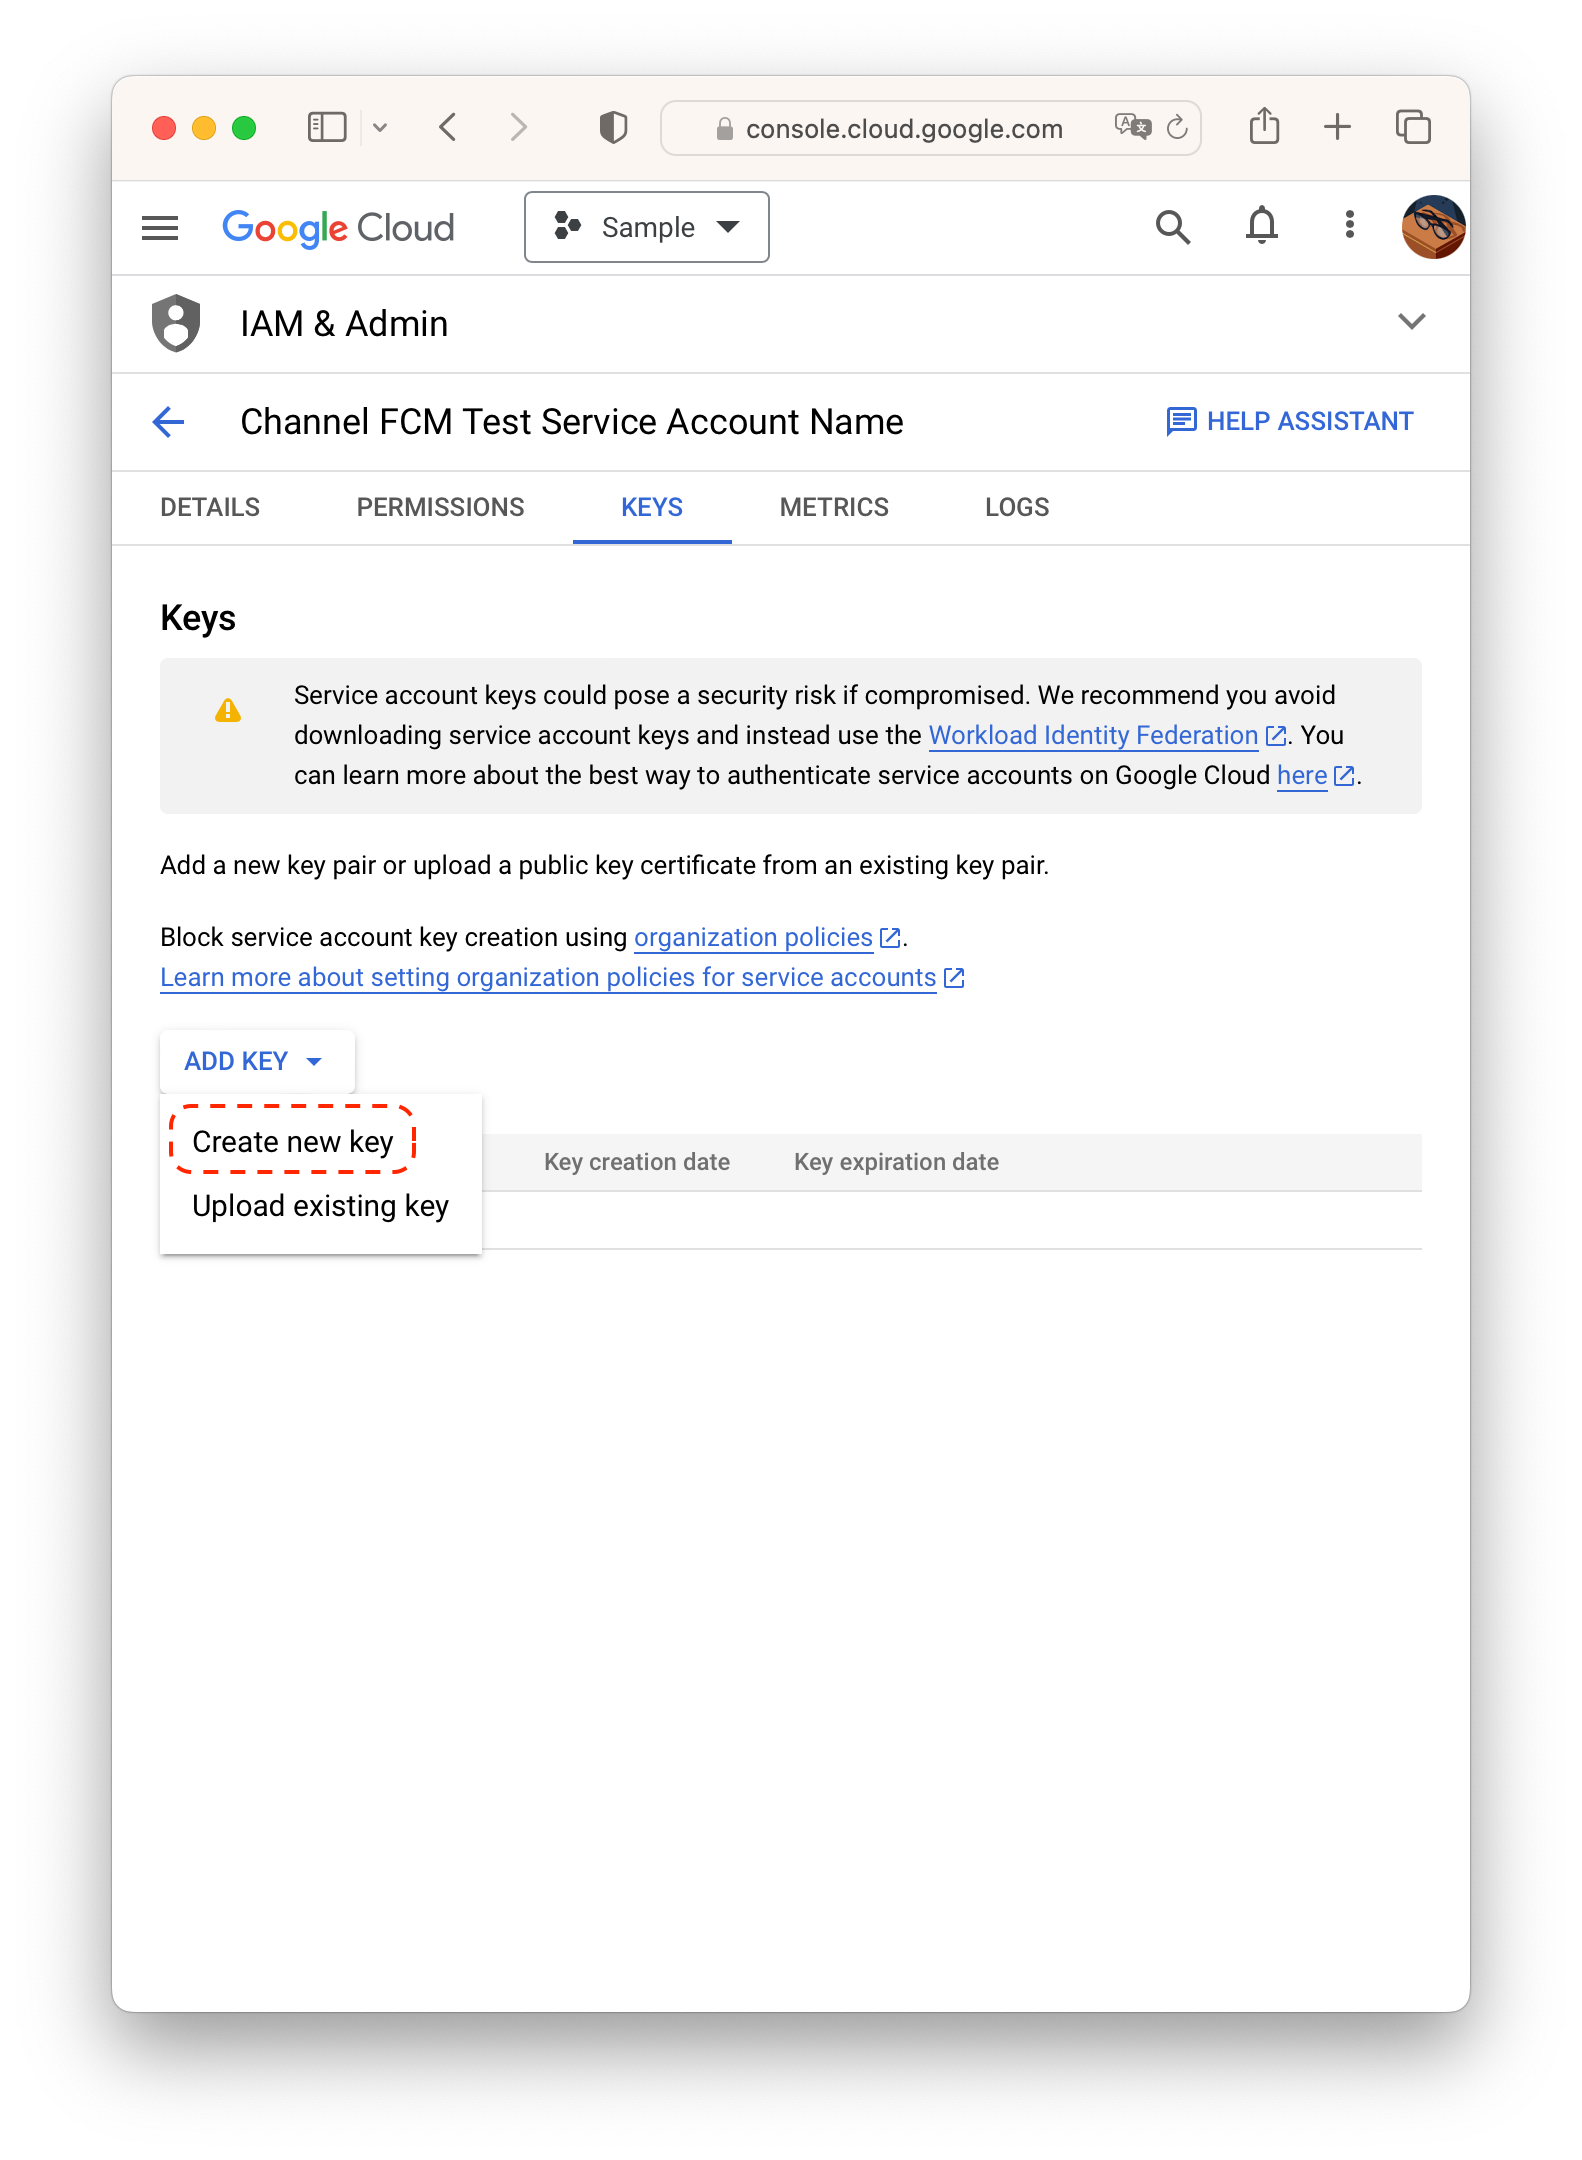
Navigate to Manage keys for the service account.
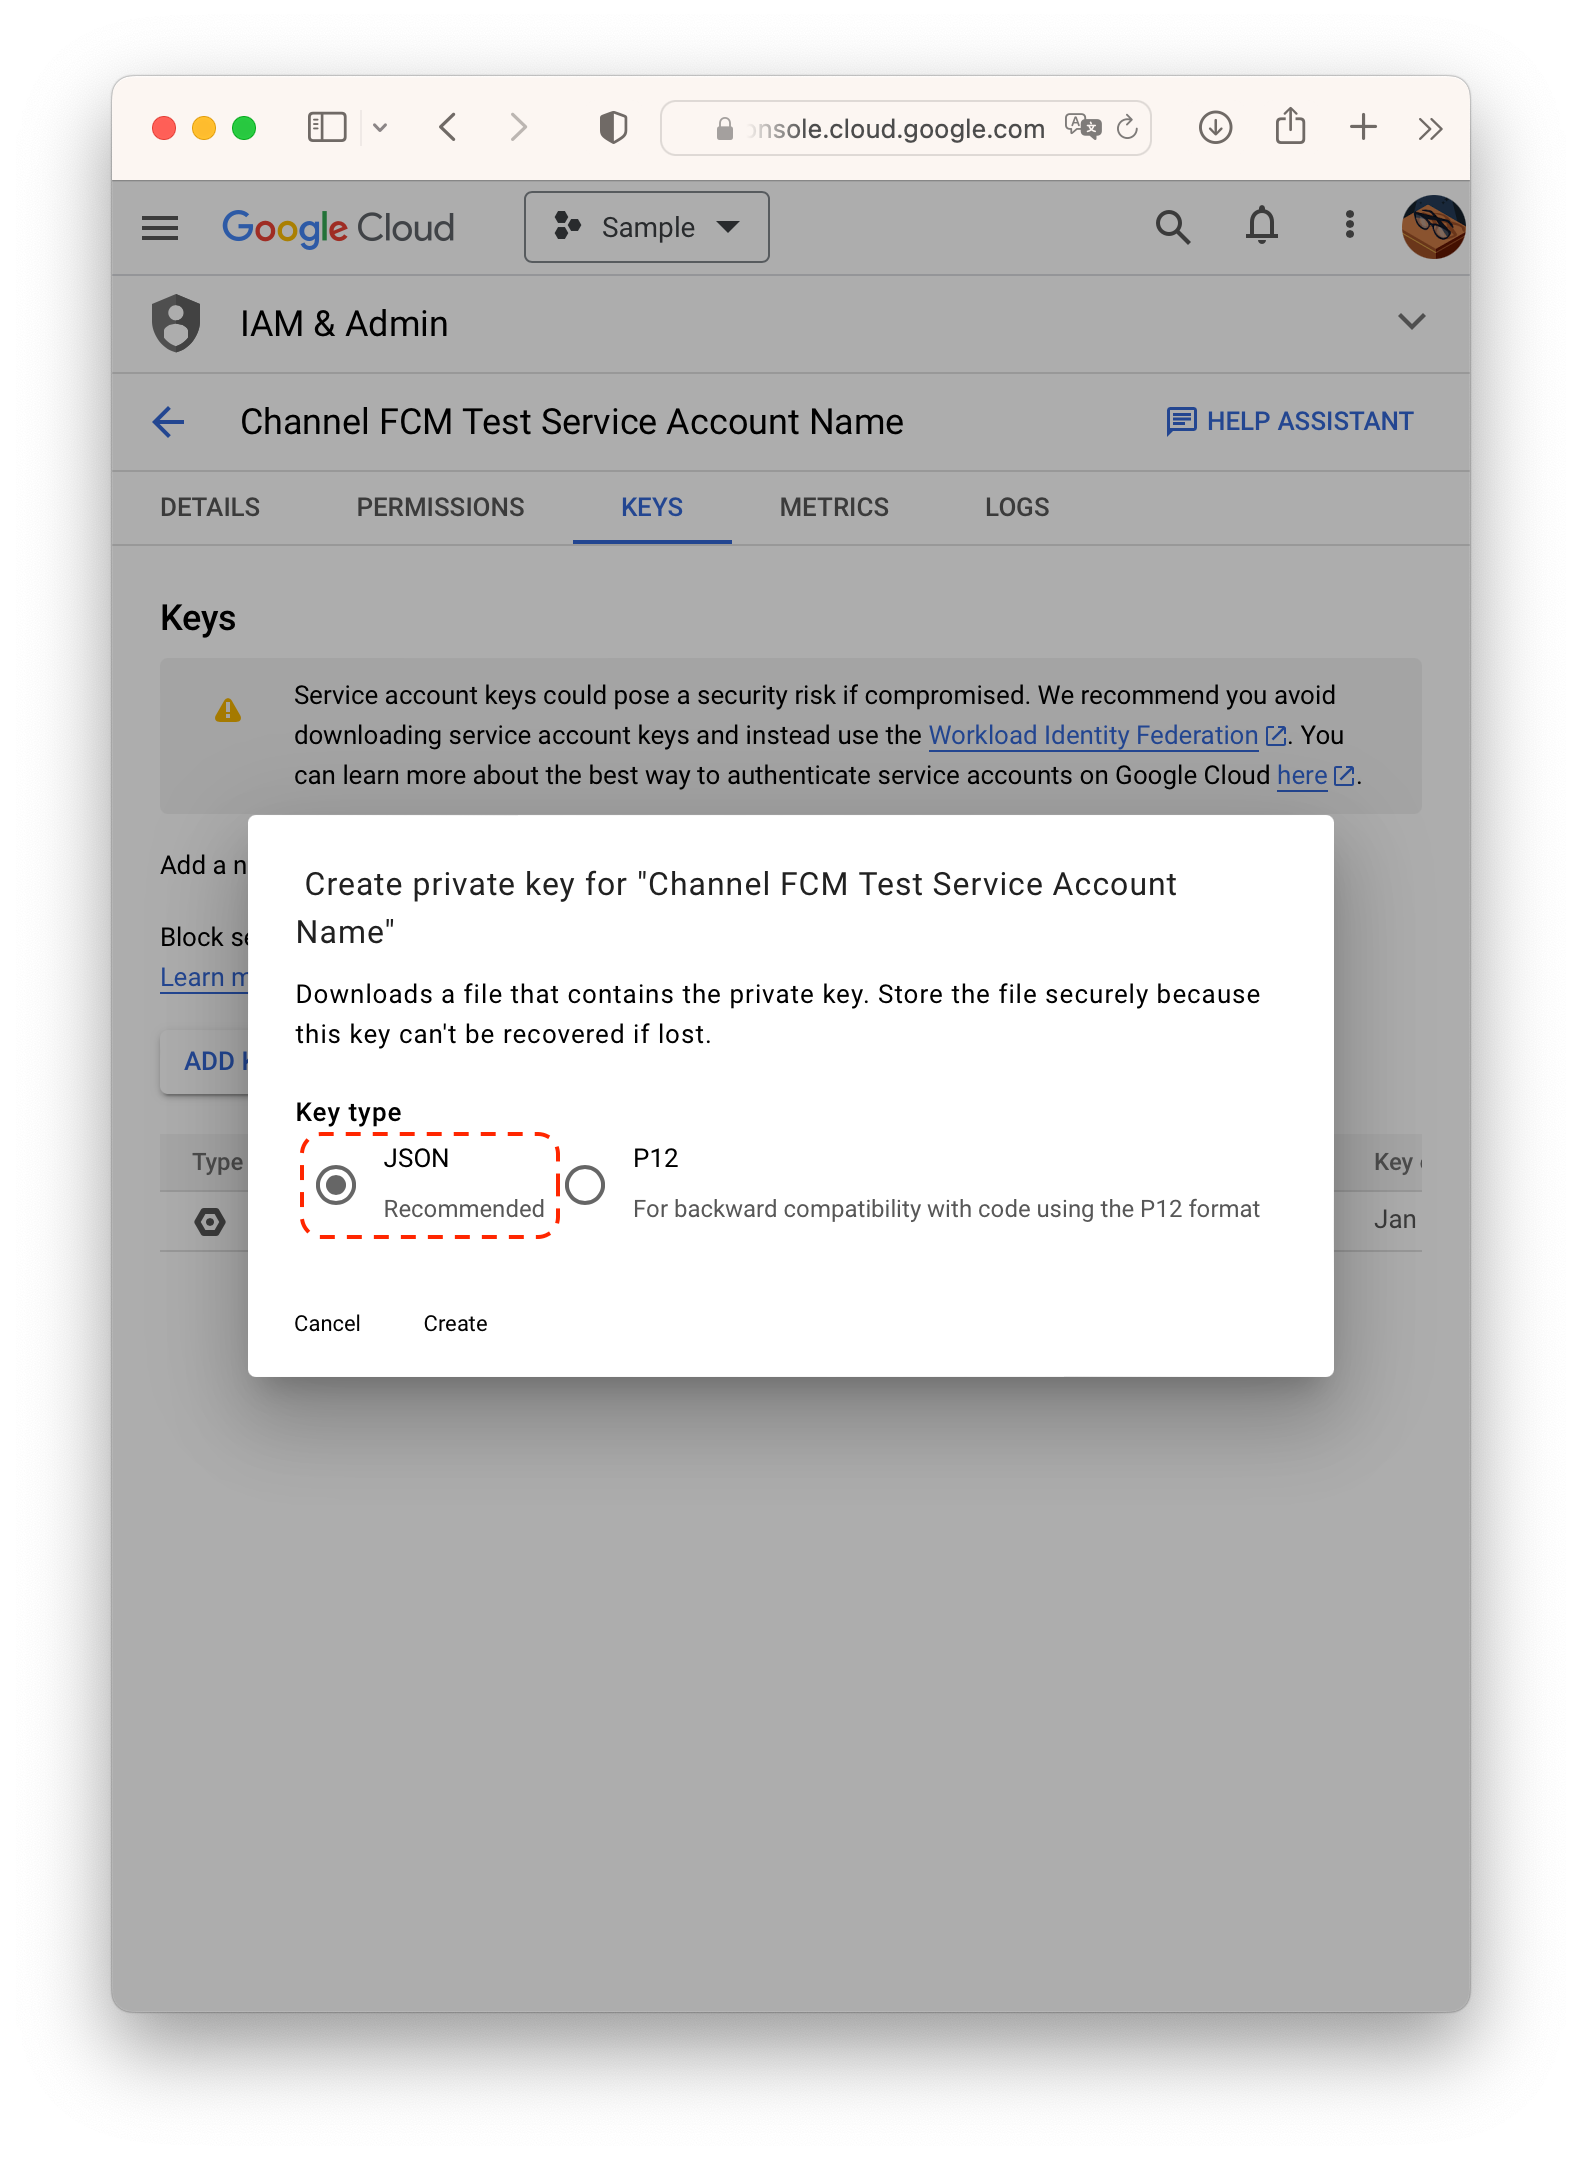
Create a key by ADD KEY > Create new key with JSON format.
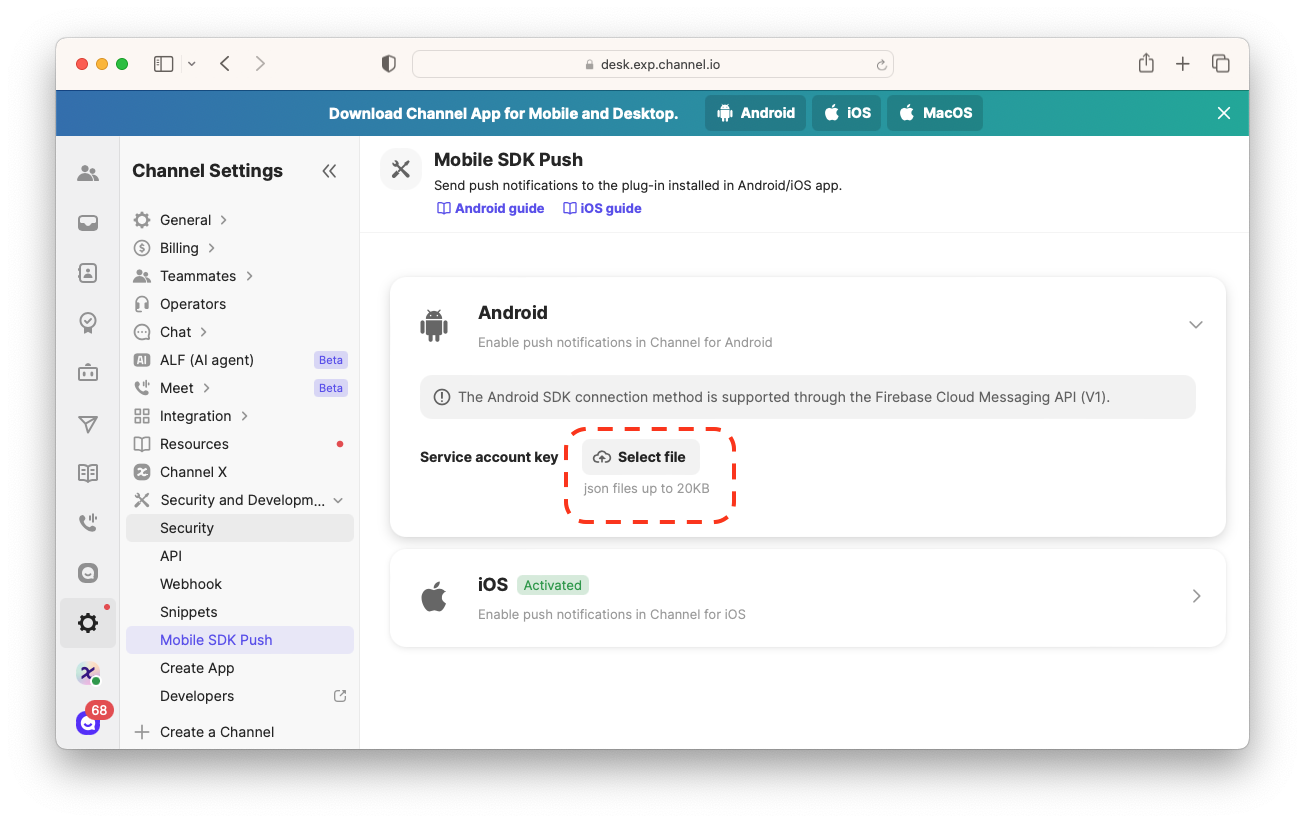
Upload the key file to Channel Desk at Channel Settings > Security and Development > Mobile SDK Push > Android
Background & Quit state messages
To receive messages normally in Background / Quit state, you need to pay attention to the FCM handler registration order. Please check the official guide document.
Follow one of the two sections based on whether your project has Firebase imported.
If your project was not using Firebase, simply add dependency on plugin-android-fcm to your app-level build.gradle. The module will register Firebase Service automatically and process Firebase messages so that you have no more work to do.
You should forward some information to the SDK to process push notifications using ChannelIO.receivePushNotification().
Then let SDK know when a Firebase message arrives.
To navigate user to the chat when they clicked a push notification add the following lines to the last line of componentDidMount in App.js.