Hello, world! 😁
Welcome to Channel’s App-server Development Tutorial!
This document allows you to do the following:
A quick understanding of the App Store
App-server development
App installation
Testing the app
This document provides an overview of the App Store and its sub-concepts. Find more information on the development guide for each item.
(→ Authentication)
(→ Function)
(→ Command)
(→ WAM)
Check the app-tutorial for the code inserted in the document.
Now, even if you're not a Channel Talk developer, you can develop the custom third-party apps you need for your channel and register with your channel!
Developers develop apps that meet the Channel Talk specification and register with the App Store server.
Channel managers can view a list of registered apps on the App Store platform and register on their own channel.
It is also possible to register the app as private and use it only on certain channels or Public to contribute to the channel App Store ecosystem.
More information about the App Store can be found on other pages.
If you already have an app server ready, try registering the app right away.
(→ Developer Portal)
Channel Talk provides a sample app, app-tutorial, to help other third-party developers easily understand the App Store and develop apps.
This app was developed using the following tools.
If you haven't installed the above tools yet, please refer to the pages and prepare them in advance.
The sample app was developed in go and typescript languages, but if you comply with the interface specifications between the App Store and the App Server, you can use a different language.
app-tutorial is implemented to perform two actions.
If the manager clicks the Send a group message as a bot button in the WAM, the app server will send a group message using the bot profile.
If the manager clicks the Send a group message as a manager button in the WAM, the WAM uses the manager profile to send a group message.
If you want to test the sample app right away without explaining the development process, please refer to the Testing part at the end of this document.
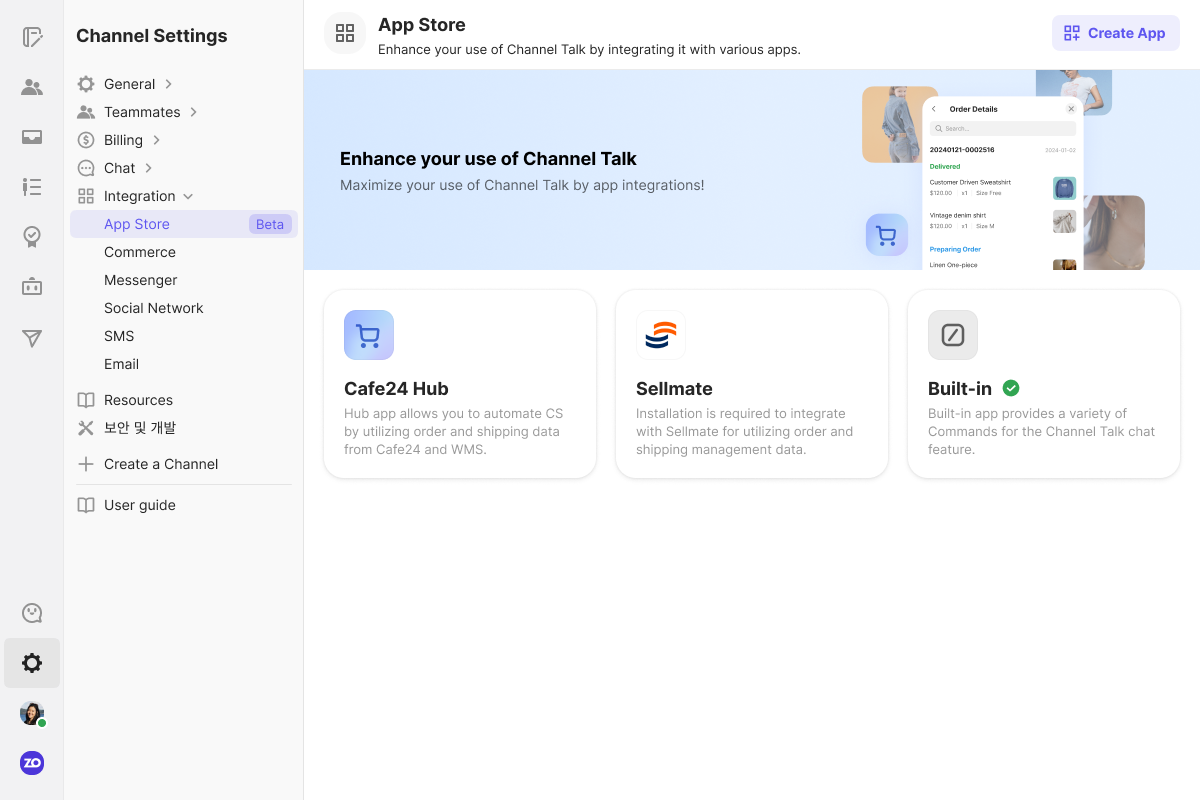
Before we develop an app server, we need to register the app first. Let's go to the App Register page and start registering the app!
Channel Talk provides an app registration platform Developer Portal, so that developers can easily register their apps on the App Store server!
(→ Developer Portal)
1. Set App Name
On the top right of the App Registration page, you can check the Create App button.
Please set the app name and click Confirm.
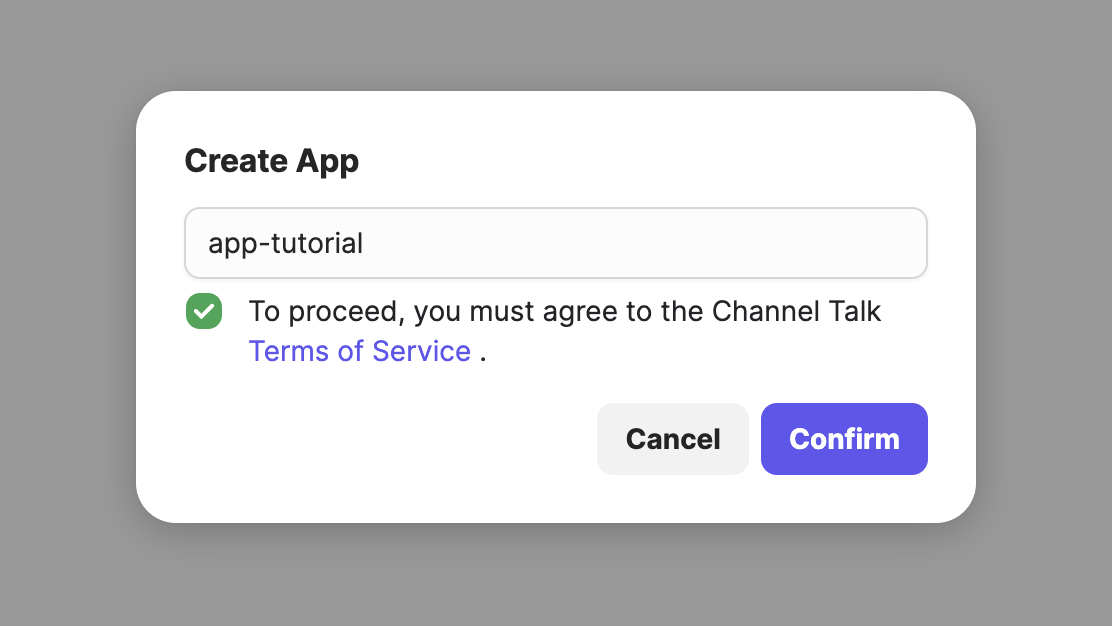
The moment you click Confirm App will be created!
But don't worry, the app name can be modified later :)
2. Enter app basic information
Now you see the default information screen.
Please enter the necessary information for each item.
Type | Description |
|---|---|
App Icon | Upload an icon to be exposed when using the App Store and Command |
App Name | App name to be exposed in the App Store |
App Description | Description of the app |
Detailed Description | Specific description of the app |
Screenshot | Image representing the functionality of the app(up to 5 images) |
User Guide | External guide documents,etc.with how to install and use the app |
3. Check App ID
If you look closely at the main information page, you can see an item called Application ID.
This value is used to identify apps in requests and responses between clients, the app store, and app servers. When developing an app, it is essential for setting up the configuration of the app server, so make sure to check where you can check the App ID.
You can copy it right away by clicking the clip icon on the right.
The server settings on the page can be registered at the time when the app server starts operating.
You need to know the App Secret in order to start the app server after you develop the app.
App Secret can be newly issued/reissued on the Authentication and Authorization page of the app settings.
(→ Developer Portal)
App servers must use App Secret to issue authentication tokens to perform the actions of app and channel permissions.
The issuance of authentication tokens for manager and user permissions is done between the Channel Talk client and the App Store, and the newly developed app server does not verify or issue them.
1. Get App Secret issued
You can issue a new App Secret by clicking the Issue button on the right side of the Secret item.
The App Secret must be safely stored after issuance for security of the app if exposed to the outside world, it must be newly issued and used.
For detailed description of the App Secret, see the Authentication page of the App Store Development Guide.
(→ Authentication)
Before developing an app, you should set what actions can be performed in the app in advance. Note that the actions which can be performed in the app are called Permission.
App permissions can be set on the Authentication and Permissions page of the app settings.
(→ Developer Portal)
When a client sends a request to the App Store or from the app to the App Store, requests that use undefined permissions will fail. Permission settings can be modified even after the app is deployed, but since they affect the development and actual behavior of the app, it is important to define the scope of the actions in advance.
The Permissions Settings screen allows you to view a list of permissions that are available in the app.
Permissions are largely subdivided into three categories.
Type | Description | Example |
|---|---|---|
Channel | Permissions on what channels can do | Send bot messages,get user and manager information |
User | Permissions on what users can do | Send user chat messages(by users) |
Manager | Permissions on what managers can do | Send group chat,direct chat,and user chat messages(by managers) |
Select the permissions you want to use in the app, and save them.
Managers using the desk app and users accessing the front can type Command in the chat window to trigger the functions provided by the app.
Commands are classified into two types.
Type | Description |
|---|---|
Desk Command | Manager-enabled commands on the desk web and app |
Front Command | User-enabled commands on the front web |
After deciding which users to open which functions to, define the commands in the following form. The query will be filled with the values required to execute the functions of the app.
/<Command Trigger> <query 1> <query 2> ... <query N>For example, the GIF Command of the Channel Talk Built-in app comes in the following forms.
1. If /gif is entered in the chat window, the app recommend a recent popular GIF search term.
/gif 2. If /gif <search keyword> is entered in the chat window, if you run the command as it is, you will see the appropriate GIF image for that <search keyword>.
/gif thumbAt this time, the operation of sending the searched GIF image to the chat window is performed in the WAM.
An WAM serves to broker users' requests to the app through a screen separate from the channel desk and front app web. For more information about WAM, visit the WAM-related page of the developer guide.
(→ WAM)
Please remember that the permissions to the actions you run in the WAM should also be defined in the app permission settings mentioned above.
The sample app introduced in this document exposes the WAM screen to the desk by typing and executing the following command in the chat window.
/tutorialIn other words, the command can be said to be a trigger to expose the WAM screen to the desk or front while delivering the necessary parameters to the WAM.
If you call the function directly from the app to the app, or through another mechanism, the command you enter through the chat window may not be essential.
For more information about Function, please check the function related page of the developer guide. Additional concepts about the command can also be found in the developer guide.
(→ Function)
Function is an interface for performing real action in the app based on values delivered from the command and the WAM.
The app server must comply with the following interfaces for each action.
1. Request is received by JSON consisting of Method, Parameters, and Context
The following points should be noted in the above code.
The information in
params.chatandcontextis a value that automatically populates the authentication token in the App Store, which is reliable.If the rule that it should only work on a specific channel must be guaranteed, please verify the value of
context.channelin the app.The
queryentered by the command is delivered throughparams.inputs.
This means that Function is the same as the specification of the action to be performed by the app and the value required at this time.
2. The app server must return JSON responses in the following form to the App Store.
The Response of a WAM Function
The Response of a General Function
WAM Function must be provided in order to show the WAM to the manager or user through Command execution.
wamArgscontains the result of processing the value required for the next operation in the WAM or the query taken from the Command.
For example, a sample app requires the following two permissions and provides two functions, including WAM Function.
1. Permission Settings
writeGroupMessage: Bots write messages to the group (what the app will do)writeGroupMessageAsManager: The manager writes a message to the group. (Action to be performed by WAM)
2. WAM Function
Request
Response
3. General Function to Send a Group Message as a Manager
Request
Response
Please refer to the above and define each function that you want to provide in the app. Not that the method name of Function may overlap between different apps.
For more information on Function, please check the function related page in the developer guide.
(→ Function)
Here are the things to consider when developing an app server.
Configuration Settings
Issuing and caching authentication tokens for app and channel type permissions
Providing a static page for WAM with WAM Endpoint
Registering Commands at the same time as the app server starts operating
Implementation of Functions and define the Function Endpoint
Please refer to the information below and let's implement it one by one!
1. Configuration Settings
The app must be able to use the following values at runtime.
Field | Description |
|---|---|
App ID | You can check it after registering for the app. |
App Secret | You can get it from-Authentication and Permissions in App Settings. |
App Store Endpoint | <> |
Please prepare the app server to use the environment variables well.
2. Issuing and caching authentication tokens for app and channel type permissions
App servers are not interested in issuing and caching manager and user type tokens.
This role is played by the Wam-controller provided by the App Store.
For more information about the Wam-controller, check the appropriate page in the developer guide.
(→ WAM)
If the app server does not perform the actions requiring channel-type permissions, go straight to the part 3..
There are two types of tokens that the app server should manage.
For a detailed description of the app type token here, please check the part 4..
Type | Description | Need to cache? |
|---|---|---|
App | Permissions for what an app can do | X |
Channel | Permissions for what an channel can do | O |
In order for the app server to successfully perform the channel type behavior set in the app settings, cashing logic is required to issue channel type tokens repeatedly and cache these values.
Cashing
Cache memory must be globally accessible throughout the project.
The important point here is that token has a duration, and cached tokens must be wiped out after this time. Cashing is critical for app servers to work well, as there is a rate-limit for requests to issue tokens.
Type | Description | Duration |
|---|---|---|
Access Token | Token used for function calls | 30 Min. |
Refresh Token | Token to reissue Access Token | 7 Days |
A detailed description of this can be found in the Authorization section of the developer guide.
(→ Authentication)
Use caching libraries, implementations of caching may vary depending on the implementation language and the behavior of the app. Therefore the codes for cashing tokens will be skipped n this paper. The codes are available on GitHub.
Set cache keys and token duration
In the sample app, it was implemented to obtain the duration and cache key for each token type in the following ways.
Please consider the following when defining the token model.
The cache key is not fixed and only needs to be defined as a unique value for the ChannelID.
Considering how long actual requests are processed on the server, we set the TTL of the cache to be slightly smaller than the real duration of Access Token and Refresh Token. (Please check the
Duration()method.)You can also take advantage of the
expires_in,expired_atvalues in the response of the token issuance without defining the duration in the app server code.
The code above can be found on GitHub.
(→ Token model implementation code)
Request to issue tokens
Now let's actually issue tokens!
You can ask the App Store for the Native Function of the following two methods to issue a new token or update an existing token.
issueTokenrefreshToken
Native Function has the following form.
For more information about Native Function, please check the function related page in the developer guide.
(→ Function)
The Params and Result in the Native Function will contain the following values.
The response of the actual token issuance request contains more information. However the sample app only uses the values of AccessToken and RefreshToken. So TokenResponse only defines these two values this this app.
For actual token requests and responses, please refer to the Authorization section of the developer guide.
(→ Authentication)
The following example uses the above DTO to request the App Store to issue a new token for a particular channel.
The above example uses the go-resty/resty library to send requests to the App Store.
Here are the important points to look at.
App Secret is imported from environment variables.
Tokens must be issued for each
ChannelID.The request is sent to
PUT https://app-store-api.channel.io/general/v1/native/function.
These issued tokens can be stored in the cache and used to send new requests.
Because of the longer duration of the Refresh Token, if the Access Token already issued has expired, you can update the token using the Refresh Token. You can update the token in the same way as issuing the token using the refreshToken function.
The implementation of the full authentication logic can be found in GitHub.
(→ Authentication implementation code)
3. Providing a static page for WAM with WAM Endpoint
Now you need to create a WAM screen for the manager and the user to show on the screen when they run the Command.
Please refer to the page related to WAM and Wam-controller in the developer guide to implement WAM.
(→ WAM)
You can find examples of WAM implementations in the sample app on GitHub.
For the sample app, don't forget that the bot profile message sending behavior (sendAsBot) is handled by the app server, and the manager profile message sending behavior is handled by the WAM.
After WAM implementation, you must provide WAM Endpoint so that the App Store can access this WAM when a request is received.
For example, the sample app added the following Handler.
In fact, the App Store tries to access the WAM with WAM path calculated in this way.
<WAM Endpoint registered in server settings>/<Action Function Name of the corresponding Command>Therefore, the actual value of the WAM Endpoint to be registered in the server settings of the sample app is <Root Endpoint of App Server>/resource/wam.
4. Registering Commands at the same time as the app server starts operating
Do you remember in the permission settings part that there are three types of permissions: Channel, User, and Manager?
In fact, there is one more permission type which is automatically registered without selecting it on the app settings.
The App permission.
Type | Description | Example |
|---|---|---|
Channel | Permissions on what channels can do | Send bot messages,get user and manager information |
User | Permissions on what users can do | Send user chat messages(by users) |
Manager | Permissions on what managers can do | Send group chat,direct chat,and user chat messages(by managers) |
App | Permissions on what apps can do | Register Commands←NEW!✨ |
The App Server must register the Commands in the App Store at the same time as it starts running.
Apps use app-type tokens to prove to the App Store that they can operate actions of the app permission. Command registration is performed only once at the start of the app server, so you don't need to keep the app token on the server.
The method of issuing an app token is very simple! It's exactly the same as the channel type token issuance described in the token issuance part.
The only difference is that the channel ID is not handed over to the App Store by the field in Params when issuing the token.
Please refer to the Authentication section of the developer guide for the exact token issuance request and response.
(→ Authentication)
Command registration uses Native Function, such as issuing tokens.
You can request to register commands by putting RegisterCommandsParams in the Params of the Native Function that you saw in the Token Issuance part.
Please take note of the following.
Issue and Reissue Tokens require an App Secret for security, which is put in the
Paramsof the Native Function.Command registration requires an App-type Token for security, which is put in the request header (
x-access-token).Command registration must be performed at the same time that the server starts.
Check GitHub for the full code on Command registration.
Please check the Command related page in the Developer Guide for exact requests and responses to Command registration.
(→ Command)
5. Implementation of Functions and define the Function Endpoint
Here, we want to implement the function and actual processing logic of the sample app as code, as defined in the Define Functions part.
(→ Function)
The sample app offers two functions.
Method | Operation |
|---|---|
tutorial | Return the WAM arguments.(WAM Function) |
sendAsBot | Write a group message as a bot profile |
Function Handler
You need to set up Endpoint to receive function requests coming into the app.
The endpoint in the form of <root path>/functions are commonly used. This value will be the Function Endpoint that will be used later to set up the server on the App Settings page.
Please write the Handler code as below.
The
JsonFunctionRequestdefines JSON request with Method, Parameters, and Context described in the Define Functions part as the structure of go.Look at the Method in the
JsonFunctionRequestand determine which function it is (tutorial? sendAsBot?) and process it separately.When an error occurs, the appropriate type of response should be given to the interface along with the 200 OK status code.
Refer to the Define Functions part of this document for request and response formatting.
tutorial (WAM Function)
If the method of JsonFunctionRequest is tutorial, you can give the following response immediately without any other action.
sendAsBot (General Function)
When the app server receives this function, the app server sends a group message to the bot profile.
Here, WritePlainTextToGroup(...) is a function that requests the Native Function of the writeGroupMessage to the App Store server.
When calling the function, take out the value in the parameters of the request and use it. You can add another query here through the command.
The full text of the Native Function requests and the code related to the above can be found on GitHub.
Feel free to add additional functions if you need them!
To make the developed app work well, Function Endpoint and WAM Endpoint must be registered in the app settings.
(→ Developer Portal)
If you follow the App-server Development part well, you can create two API endpoints on the app server.
Type | Description |
|---|---|
Function Endpoint | API URL for requesting Function and receiving results |
WAM Endpoint | API URL for requesting WAM Arguments and receiving results |
Please put the values in App Information → Server Settings and save them.
For the Signing Key, please check the guide on the screen.
Function Endpoint and WAM Endpoint for the sample app are as follows.
Type | Description |
|---|---|
Function Endpoint | <> |
WAM Endpoint | <> |
The sample app can be tested in the local environment using ngrok! For more information, please refer to the Testing part.
You can check the apps you registered on the App Store platform on Channel Talk desk.
If you haven't set the app settings to Public, you can check the apps in the private apps I registered at the bottom of the app list. Let's click the app card to go to the app information.
1. Installation
When you go to the app information screen, you can see the Install button on the right. Click the button to start the installation
Before installing the app, make sure that the permissions you set when registering the app are included well. If there is no problem with them, please click the OK button to install the app.
2. Start your app server!
App and Command are now available in the Channel Talk chat window!
3. Check the Commands
When the app server starts operating, you can see the Commands tab on the app information screen. The Commands tab lets you see a list of commands with the Use Commands toggle that managers and users can trigger.
Test the WAM and Function in your local environment before publishing the app server endpoint and the app in public.
This article introduces how to test a sample app in your local environment using ngrok. If ngrok is not ready yet, please refer to the page to prepare the tool.
If you want to use another method, you don't have to use it. You can also test the app you developed yourself by referring to the information below.
1. Download Project
Please download the app-tutorial project from GitHub.
$ git clone https://github.com/channel-io/app-tutorial2. Preparing App Configuration.
Fill in the required variables in the sample app's configuration file.
Channel Talk does not disclose the App ID and App Secret of the sample app.
If you want to test a sample app, create a test app in the App Registration page and prepare the required value. The newly created test app must have the permissions of writeGroupMessageand writeGroupMessageAsManager.
stage: development

appId: # app id registered in app-store
appSecret: # app secret issued by a manager

api:
  public:
    http:
      port: 3022

appStore:
  baseUrl: https://app-store-api.channel.io

bot:
  name: AppTutorialBot
It is recommended to leave the
stageas it is.Please put the prepared values for
appIdandappSecret.
3. Running the App Server
Please run the app according to README.
$ make dev4. Run ngrok
Run ngrok to forward requests from the App Store to the local endpoint where the sample app is running. The arguments that you hand over to the ngrok may vary depending on the environment you are testing.
$ ngrok http http://localhost:3022 --subdomain app-tutorial --region apYou can see the endpoint provided by ngrok on the screen after running ngrok, which becomes the root endpoint for Function Endpoint and WAM Endpoint.
ngrok                                                                                          (Ctrl+C to quit)

Full request capture now available in your browser: https://ngrok.com/r/ti

Session Status                online
Account                       <Your Account> (Plan: ...)
Version                       3.9.0
Region                        Asia Pacific (ap)
Latency                       83ms
Web Interface                 http://127.0.0.1:4040
Forwarding                    https://app-tutorial.ap.ngrok.io -> http://localhost:3022

Connections                   ttl     opn     rt1     rt5     p50     p90
                              0       0       0.00    0.00    0.00    0.00
Here we see that the endpoint of the sample app is https://app-tutorial.ap.ngrok.io.
5. Register Endpoints for Server Settings
Refer to the Server Settings part of this document and save Function Endpoint and WAM Endpoint on the Settings page of the test app.
Here, the two values are respectively.
Function Endpoint:
https://app-tutorial.ap.ngrok.io/functionsWAM Endpoint:
https://app-tutorial.ap.ngrok.io/resource/wam
6. Installing the app
Please refer to the App Installation part of this document and install the app on your test channel.
The newly registered test app is only available on channels where the app is installed.
7. Try the Command
Try typing the Command in the chat window!
Enter Command
Open WAM (Run Command)
Create a group message with a bot or your manager profile
When each button is clicked, the following message is sent to the group chat.
Now we’re done with the tutorial to develop the channel app!