If your service already provides push notifications, you can skip the steps below.
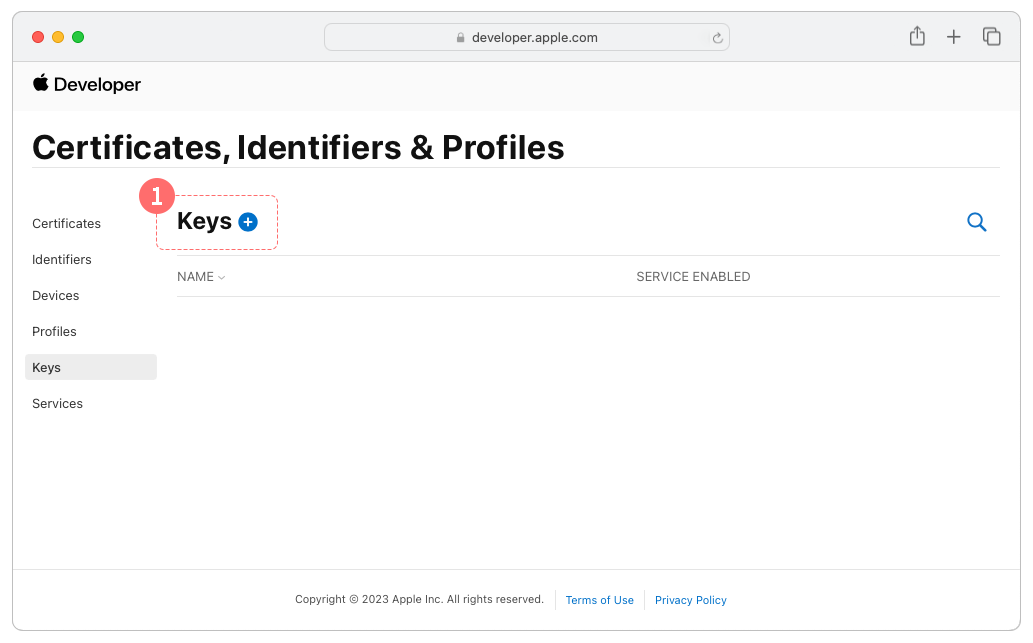
Generate a key with the Apple Push Notification Service enabled on the Certificates, Identifiers & Profiles > Keys page.
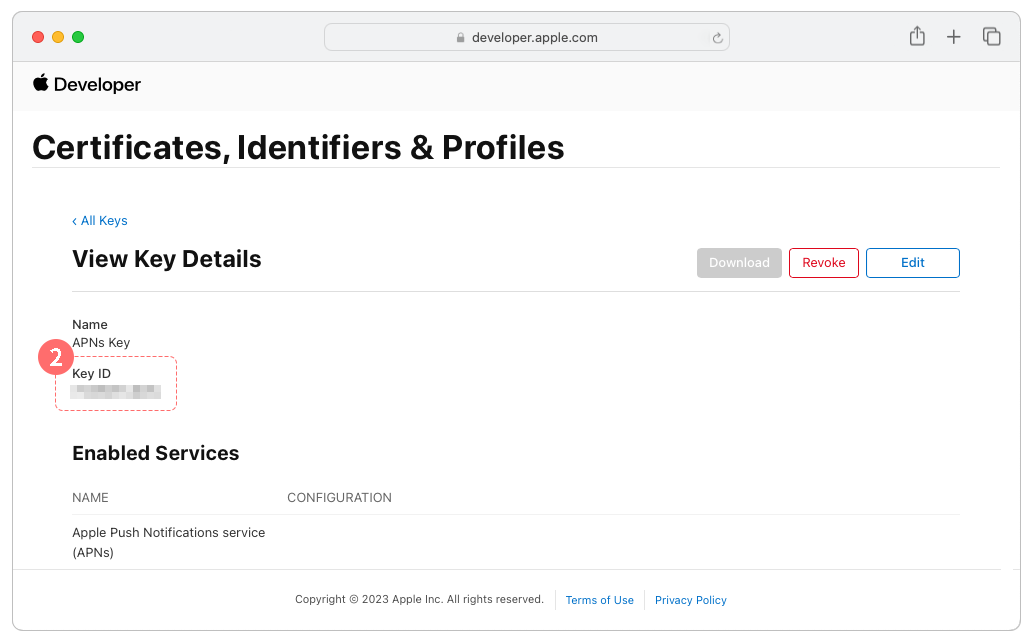
Retrieve your Key ID. Please be aware that you can download the issued credential key only once.
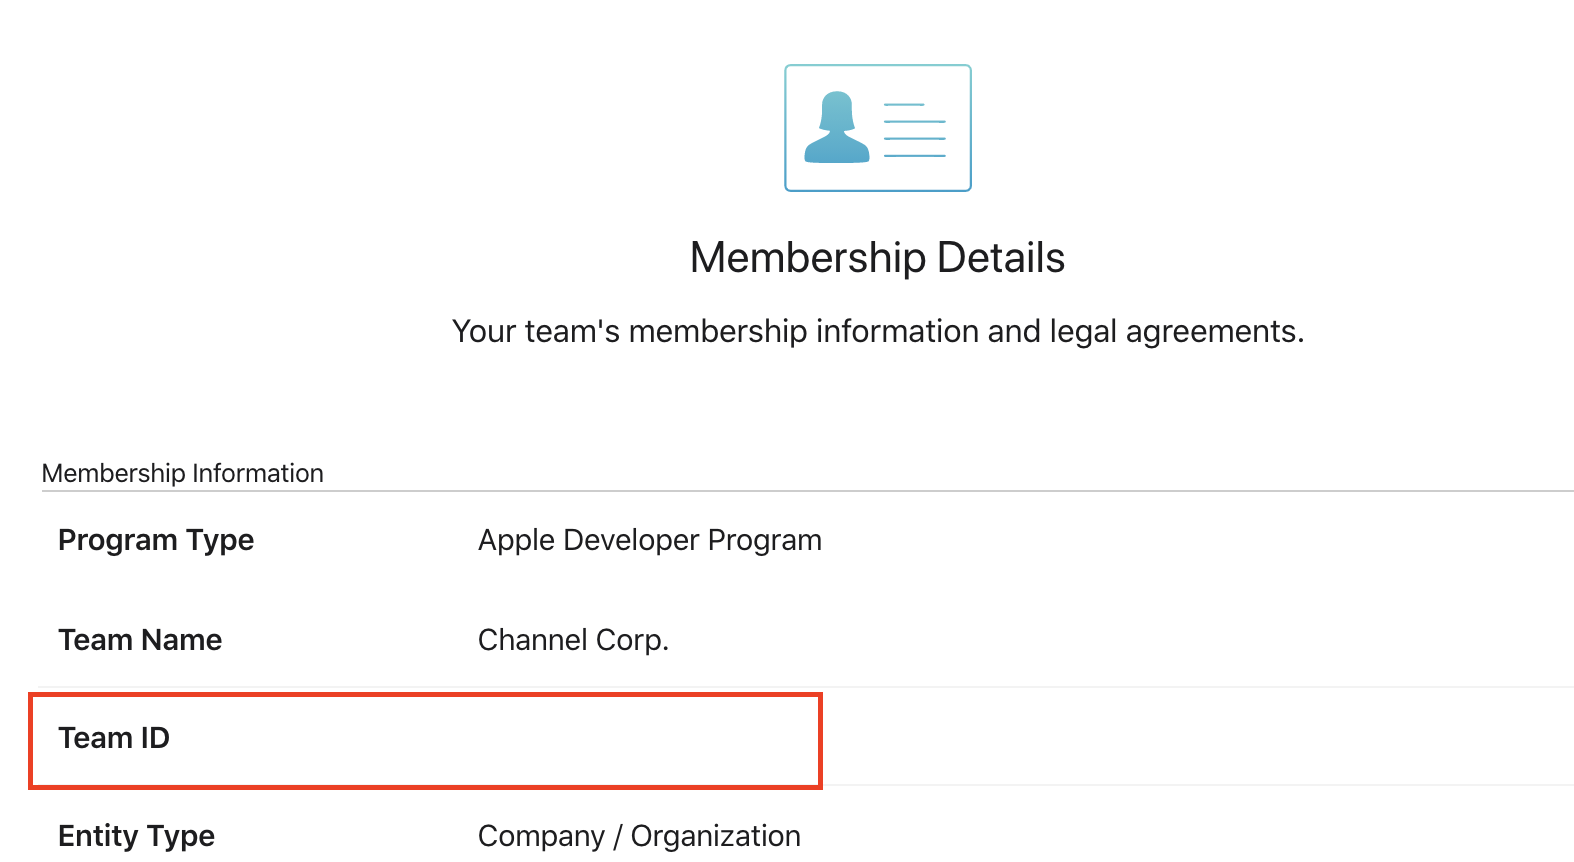
Check Team ID in. Account > Membership page.
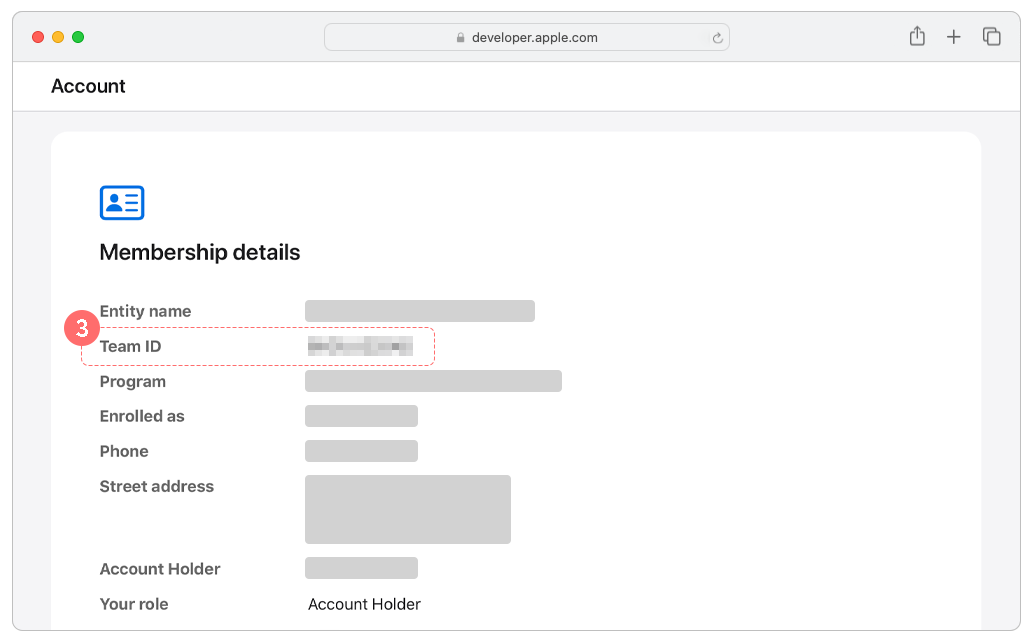
Navigate to Account > Membership tab, and verify your Team ID.
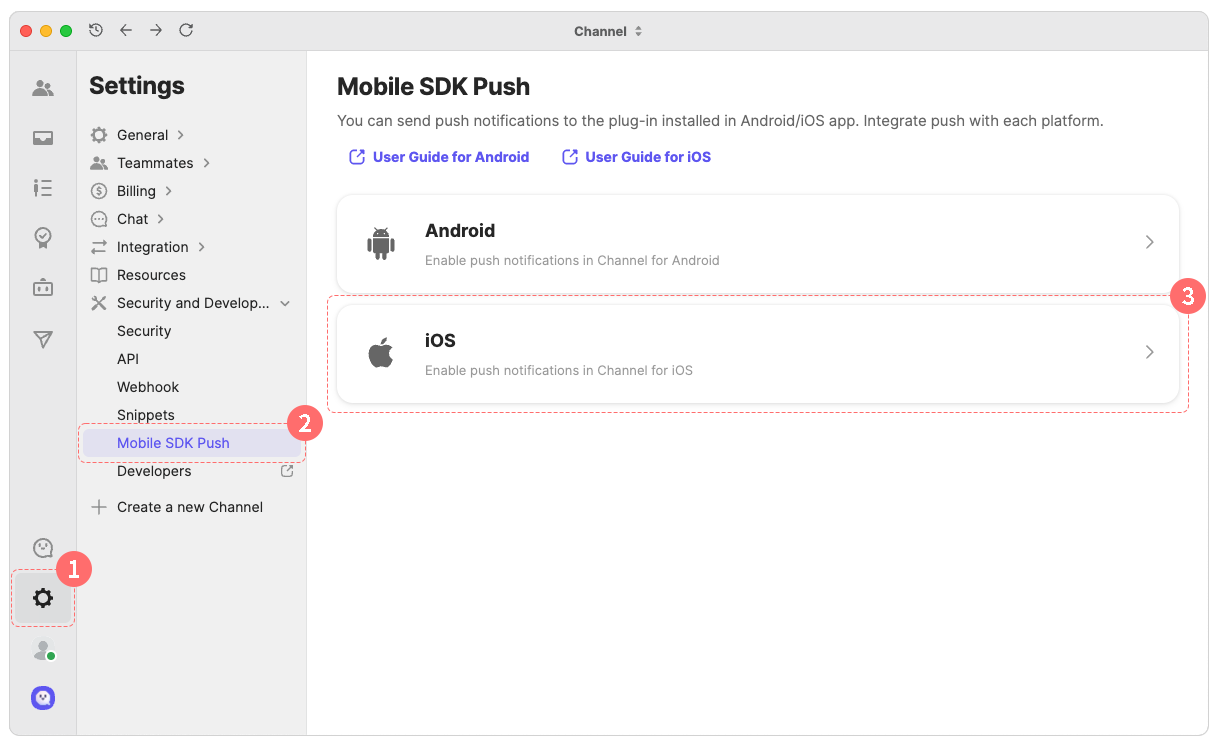
Launch ChannelTalk (PC), and navigate to the Settings > Security and Development > Mobile SDK Push Section.
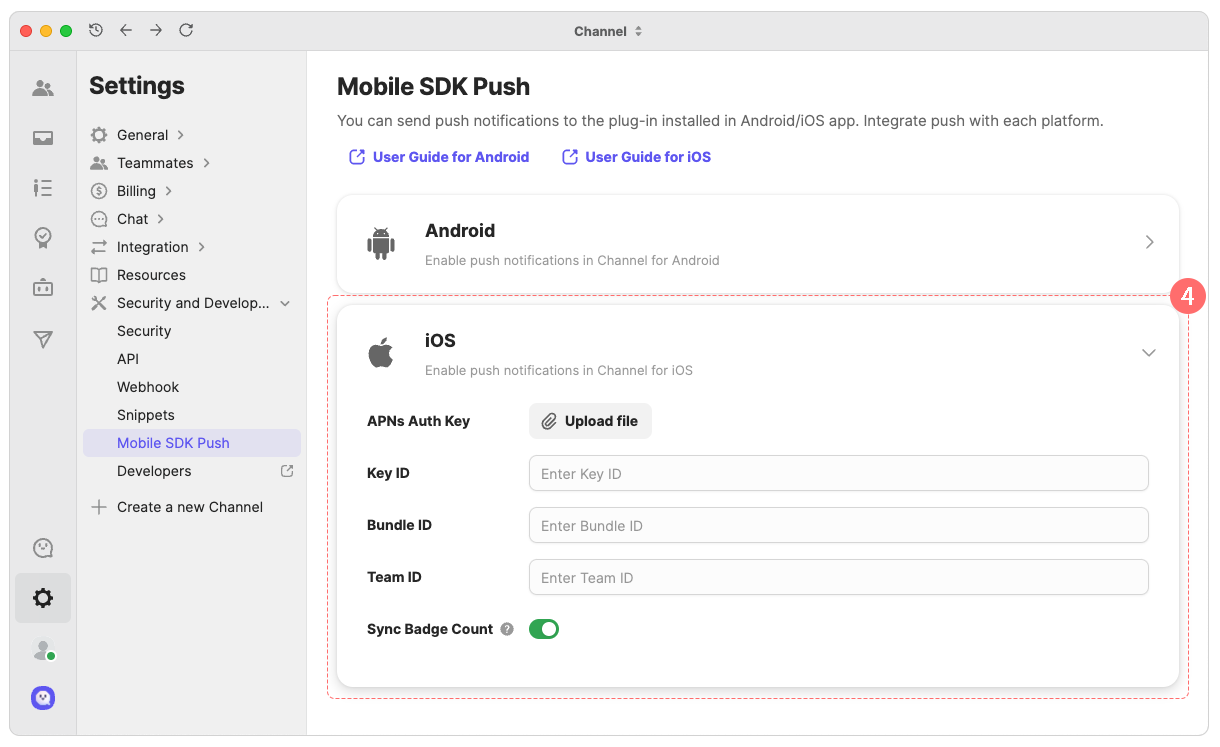
Upload the downloaded Key file, and provide the Key ID, Bundle ID, and Team ID.
Registering the device token using initPushToken to receive remote notifications in Channel.
Refer to the example below, add initPushToken to the application(_:didRegisterForRemoteNotificationsWithDeviceToken:) method.
When a Channel Talk remote notification arrives in the background or terminated state, you can save the notification to display it appropriately when the app is in the foreground state.
Here is an example of what happens when the user taps the push notification. If it is a Channel Talk notification, it notifies Channel Talk that you have received a push notification and saves it.
If you have successfully stored Channel Talk remote notifications using the storePushNotification, you can open a chat containing saved push messages via the openStoredPushNotification method.
Add the following example to the ViewController where you want to open the Channel Talk chat.
class ViewController : UIViewController {
  override func viewDidLoad() {
    super.viewDidLoad()

    if ChannelIO.hasStoredPushNotification() {
      ChannelIO.openStoredPushNotification()
    }
  }
}@implementation ViewController
- (void)viewDidLoad {
[super viewDidLoad];
if ([ChannelIO hasStoredPushNotification]) {
[ChannelIO openStoredPushNotification]
}
}
@endTo prevent push notifications and SMS from being delivered simultaneously, you need to notify Channel when a remote notification arrives.
Navigate to the Capabilities tab and add Background Mode. Enable both Background fetch and Remote notification.

Then, add the receivePushNotification method to notify Channel that a push notification has arrived successfully. Refer to the example below:
This extension enables appropriate handling of Channel Talk remote push notifications, even when the app is running in the background or has been terminated.
Channel Talk recommends adding this Extension. If you do not add this, you may receive both follow-up text messages and remote notifications.
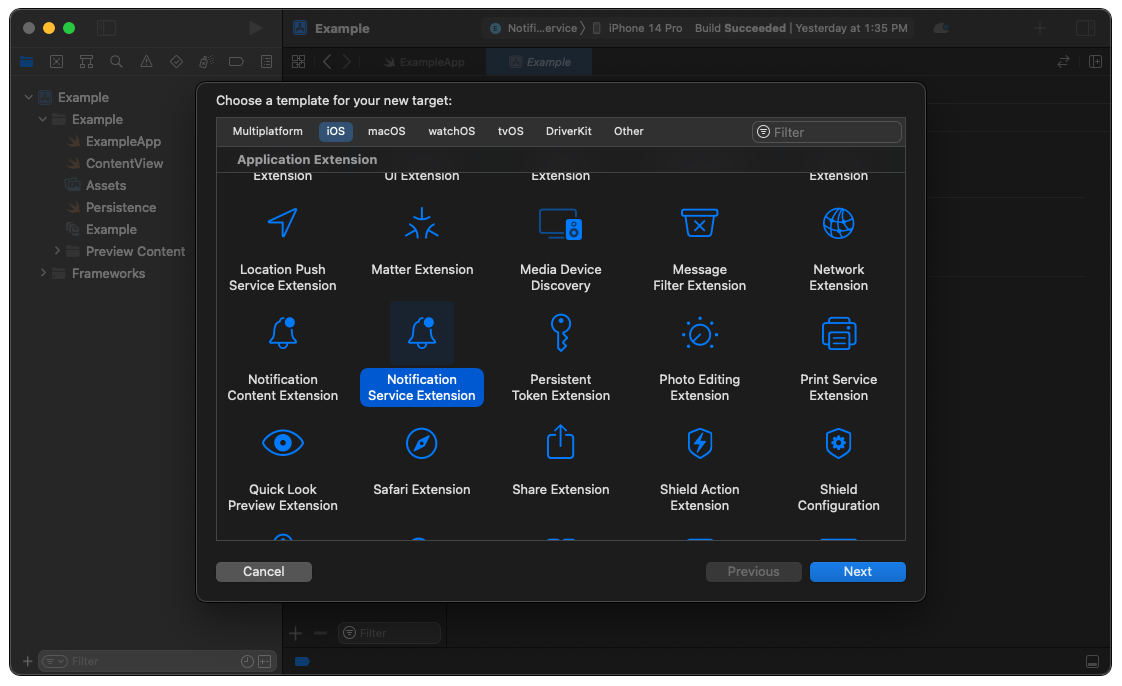
From the Xcode Menu, Click File > New > Target… .
In the select a new target window, click Notification Service Extension.
Xcode creates a new Target. For Swift, you can see two generated files, and three for Objective-C.
The description of the newly generated file are as follows:
NotificationService.swift: Write the code used inside the extension target.Info.plist: info.plist file of extension Target
Add the SDK dependency to the newly created Extension Target. Modify the Podfile as follows:
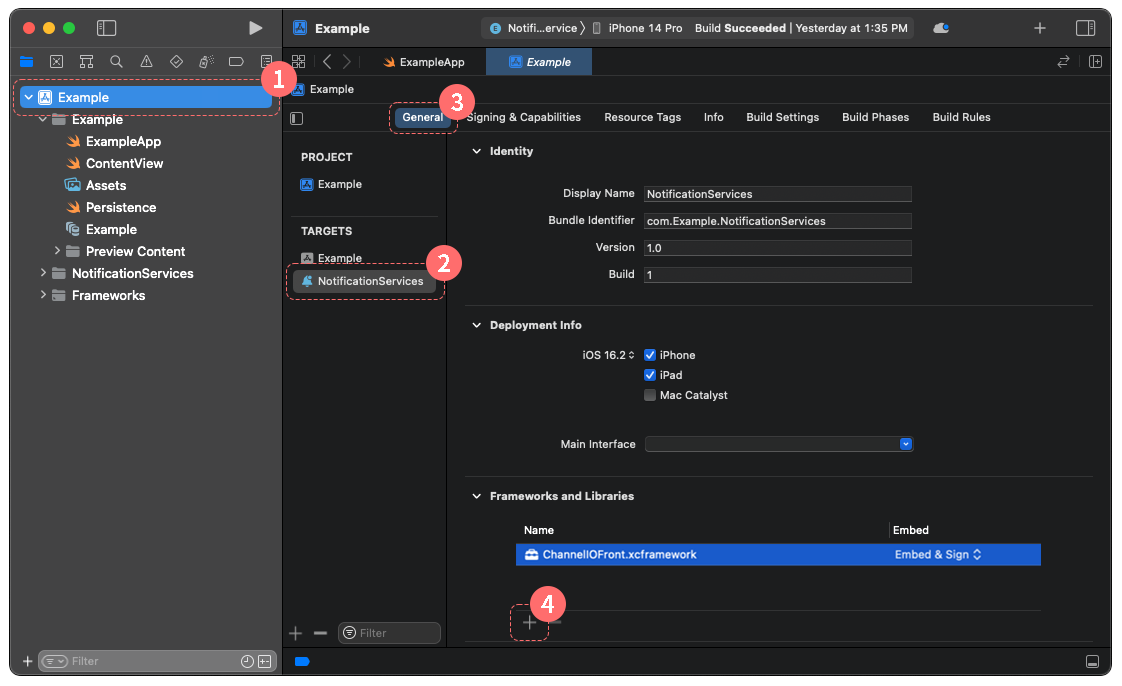
Navigate to the project settings for the newly created target.
Go to the
Generaltab.Add the
ChannelIOFrontpackage to theFrameworks and Librariescategory.
Add the following example based on your project language settings.